Axe-Fest II

SOLVED!

During the "Total Control with the MFC-101 and Mission pedals" session on Saturday someone asked Matt to add a VOL block to the setup so you could have three separate blocks (WAH, PIT and VOL) all being controlled by a SINGLE Mission expression pedal, but selected via scenes.

It didn't work out quite well on stage, which is how Murphy's Law says things will go when you take random user suggestions live for anything other than improv comedy, but I was pretty sure they're like one setting away from being there. So I sat down when I got home and sorted it out.

Here you go: Axe-Change - Download Preset - 3:1 Controller - by iaresee

In this path there are three blocks all being controlled by External 1:

The WAH block is auto-engaged. The PIT block is in classic whammy +1 Octave mode and is also auto-engaged. And the VOL block is as well.

When you're on Scene 1 you're using the WAH block with External 1. When you're on Scene 2 you're using the PIT block with External 1. And when you're on Scene 3 you're using the VOL block with External 1.

Scenes 4-8 show you the "setup mode" where all three block are in their inoperable state and no sound is bypassed. To put the WAH in a scene you switch it from the Y state (in operable because of it's level and bypass mode settings even with auto-engage in use) to the X state (that was the little bit of brilliant that Matt exposed me to during the presentation on Saturday). To put the PIT in a scene you also switch it from the Y state to the X state. And to put the VOL in a scene you switch it from bypassed to engaged.

Needless to say you can expand this to 8 distinct blocks in a patch, even if they're not all running in parallel like this. You just need to add a spare VOL block on the fourth column to pass signal when you want to use a block further down the chain with the External 1 controller.

How freaking cool is that?

EDIT: Why stop with only a 3:1 multiplexing? Let's do it with EIGHT blocks!

Here's the 8:1 Controller patch: http://axechange.fractalaudio.com/detail.php?preset=1822

Scene 1: WAH, auto-engaged
Scene 2: PIT, auto-engaged
Scene 3: VOL 1 for swells
Scene 4: CHO engaged, controller is used for depth of chorus
Scene 5: FLA engaged, controller is used for rate of the flanger
Scene 6: DLY 2 engaged, controller is used to send the tape delay in to self oscillation! Oh fun!
Scene 7: ROT engaged, controller is used for the speed of the rotary effect
Scene 8: PHA engaged, controller is used for the speed of the classic vibe effect
 
Last edited:
Here are snippets from Cliff's Amp block presentation as I remember them. In no particular order.
This is just part of it. And I'm leaving out the scientific technical bits.

IR: most important sound component. And the whole capturing chain is important, including preamps etc. Lesson learned while recording the Producer Pack IRs.

Preamp distortion: sounds tight, focussed, but not dynamic.
Power amp distortion: sounds loose, spongy.

Master Volume: most important amp control for tone. You have to find the sweet spot. Stock preset are set to sweet spots, subjectively (based on the guitar used and Cliff's personal opinion). Start at 3 and increase until desired compression is reached. Do not use it for volume. Don't turn it up too much (unless it's a non MV amp).

If an amp has Input Drive and Overdrive, use the first for tone shaping. Use Overdrive as a flat gain control.

Presence/Depth: tone controls for power amp.

Bright cap is used on real amps to equalize guitars with weak pickup loads. Treble increases as Drive is decreased. Increase its value (Adv page) for more mids = more gain.

Saturation: it's the José Arredondo mod on real amps, consisting of rearranged electrical components (diodes). Resulting in less power amp smoothing and therefore meaner distortion.

FAT: shifts the tone stack graph. This for example decreases/changes the dip of the mids which occurs in many tonestacks.

Comp: simulates the cathode follower that Marshall added to amps.

Input trim: related to an amp with two inputs (lo and hi). The model of such amps always is based on the hi input. To simulate the low input set trim at 0.500.

Boost: is the same as setting Input Trim at 4.

Cut: is a high pass filter at the input, for tighter bass.

Dynamics: something which real amps can't do. Controls compression. Adjust to make the amp sound tighter or looser.

Dynamic Presence and Depth: something which real amps also can't do. These are distortion-dependent treble and bass filters (require distortion).

Character: same as Dynamic Presence and Depth, but the frequency is adjustable.

Definition is a tilt EQ like the one you can select in the Filter block, at the input. It's a treble boost / cut.

Pick attack: adjusts the initial attack.

Thunk: simulates the low-freq. reinforcement of a guitar body near a cabinet.

Transformer Match: controls power amp clipping. Similar to adjusting MV and to mismatching an amp and speaker. Decrease it to make the sound broader.

Transformer Drive: affects the bass freq.

Bias: controls overlap of crossover distortion. Lower bias is more crossover distortion. Can be heard as fizz. It's sometimes desirable. Most amps are biased cold but are often modded to higher values.

Old amps have ghost notes, those tones you hear beneath the note you're letting ring. Crank up SAG Supply in a Plexi to hear them. Switch Power Supply to DC to get rid of them.

Boss HM2 pedal will be modeled.
 
Last edited:
Here are snippets from Cliff's Amp block presentation as I remember them. In no particular order.
This is just part of it. And I'm leaving out the scientific theoretical bits.

IR: most important sound component. And the whole capturing chain is important, including preamps etc. Lesson learned while recording the Producer Pack IRs.

Preamp distortion: sounds tight, focussed, but not dynamic.
Power amp distortion: sounds loose, spongy.

Master Volume: most important amp control for tone. You have to find the sweet spot. Stock preset are set to sweet spots, based on the guitar used and Cliff's own opinion. Start at 3 and increase until desired compression is reached. Do not use it for volume. Don't turn it up too much (unless it's a non MV amp).

If an amp has Input Drive and Overdrive, use the first for tone shaping. Use Overdrive as a flat gain control.

Presence/Depth: tone controls for power amp.

Bright cap is used on real amps to equalize guitars with weak pickup loads. Treble increases as Drive is decreased. Increase its value for more mids = more gain.

Saturation: it's the José Arredondo mod on real amps, consisting of rearranged electrical components (diodes). Resulting in less power amp smoothing and therefore more mean distortion.

FAT: shifts the tone stack graph. This for example decreases the dip of the mids which occurs in many tonestacks.

Comp: simulates the cathode follower that Marshall added to amps.

Input trim: related to an amp with two inputs (lo and hi). The model of such amps always is based on the hi input. To simulate the low input set trim at 0.500.

Boost: is the same as setting Input Trim at 4.

Cut: is a high pass filter at the input, for tighter bass.

Dynamics: something which real amps can't do. Controls compression.

Dynamic Presence and Depth: something which real amps also can't do. These are distortion-dependent treble and bass filters (require distortion).

Character: same as Dynamic Presence and Depth, but the frequency is adjustable.

Definition is a tilt EQ like the one you can select in the Filter block, at the input. It's a treble boost / cut.

Pick attack: adjusts the initial attack.

Thunk: simulates the low-freq. reinforcement of a guitar body near a cabinet.

Transformer Match: controls power amp clipping. Similar to adjusting MV and to mismatching an amp and speaker. Decrease it to make the sound broader.

Transformer Drive: affects the bass freq.

Bias: controls overlap of crossover distortion. Lower bias is more crossover distortion. Can be heard as fizz. It's sometimes desirable. Most amps are biased cold but are often modded to higher values.

Old amps have ghost notes, those tones you hear beneath the note you're letting ring. Crank up SAG Supply in a Plexi to hear them. Switch Power Supply to DC to get rid of them.

Boss HM2 pedal will be modeled.

This is all very important info every Axe owner should know/understand. Thanks Cliff and Yek!
 
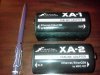
These a for the MK-lll or is this going to replace out Ethernet cable on the older MFC 101's

They're used with the MkIII and < MkIII models alike. On the Axe-Fx side you need one if you're using the MkIII because there's no FASLINK port on your Axe-Fx. If you have a MkIII that's all you need is the one box on the Axe-Fx side. You need both if you want to use FASLINK with a < MkIII MFC.
 
Axe Fest ruled. I had such a good time performing and hanging with my fellow Axe Fxrs and am also absolutely inspired after this weekend of talking about guitar, tone, and seeing the other incredible artists play some great music.

So much more can be said about how great it was, but I'll just leave it at this..

I'm thrilled to live in a time where something like the Axe FX is available as a tool for us musicians, and there couldn't be nicer and cooler people behind FAS.
 
Back
Top Bottom