FAMC Liquid Foot+ LF+ and Axe-Fx III Quick Setup and Templates

GotMetalBoy

Power User
I made some templates so the FAMC Liquid Foot+ LF+ can be quickly setup to use with an Axe-Fx III

The easiest way to setup the LF+ for an Axe-Fx III, is to use my template and assign whatever buttons are needed on the Pages and if they need to use IA's above 60, to use IA-Maps to re-arrange the IA's. If Presets above 384 are needed, the PC#'s can be changed in presets. If presets need to be selected non-sequentially, put the LF+ into Song mode and arrange the presets in any order needed into a song. If you want to be able to sequentially scroll through all 512 Axe-Fx III presets, use the IA's named PC# INC and PC# DEC, which I've included on Page 2 named Page Utility(Pg Util).

Here's the link to my Dropbox with the files:
# https://www.dropbox.com/sh/heghqmz9onvv948/AAA6ysP7v4wnGWxAzHwAC9joa/LF+ Editor Sysex Files/!Axe-Fx III?dl=0
## The main template to get you up and running quickly is: "Axe-Fx III Template Presets (Names v12p09) Songs Set-Lists Pages IA-Slots IA-Maps Global"

I also have a folder named "Individual Files" that has all the IA-Slots programmed for the Axe-Fx III:
# https://www.dropbox.com/sh/heghqmz9onvv948/AAA87AAtsbIubjxHk6hcpqOCa/LF+ Editor Sysex Files/!Axe-Fx III/Individual Files?dl=0

I used LF+ firmware v6.32 and LF+ Editor v6.31. So far I have not run into any bugs with the firmware and only a couple minor bugs with the Editor that I found workarounds for.

The main template has every Axe-Fx III Block 1 IA-Slot but if you need Blocks 2-4, you can load them from the individual files. I made sure to put the IA-Slots in the individual files starting after the default slots 1-60, so you can load them into the Editor and drag them to the slots you want or you can create your own IA-Maps.

All the Channel IA-Slots are programmed to display a menu, so you can select Channel A-D and when you select a Channel, it will also enable the associated block if it's disabled.
== Example ==
# Delay 1 IA-Slot is disabled
# Step on the Delay 1 Channel IA-Slot
# Step on any channel A-D
# Now the channel is selected and the Delay 1 IA-Slot is enabled too

== Tip for assigning Block and Channel IA-Slots ==
# In the LF+ Editor, go to the Global tab
# Under Hardware:
## Enabled "Force 2nd func ASAP" (Make button Green)
## Under "Combo Button Press Blocking", enable SAVE/COPY (Make button Green)
# Go to the Page tab
# Select a Page you want to edit
# Select a button you want to edit
# Assign Function 1 to a Block IA-Slot like the Delay 1 Block
# Assign Function 2 to the associated channel Delay 1 Channel
# Change the button's "Button Pressed Trigger Type" from "Toggle & Trigger" to "Trigger Only"
# Now you can change the Delay 1 Block's bypass state from ON/Bypass and if you hold the button down the Channel menu will open, so you can select channel A-D

All the Scene IA-Slots toggle
== Example ==
# S1 toggles to S2
## Step on S1, S1 will be selected
## Step on S1 again, it will toggle back and forth between S1 and S2

# S2-S4 toggles to S1
## Step on S2, S2 will be selected
## Step on S2 again, it will toggle back and forth between S2 and S1
## Step on S3, S3 will be selected
## Step on S3 again, it will toggle back and forth between S3 and S1
## Step on S4, S4 will be selected
## Step on S4 again, it will toggle back and forth between S4 and S1

# S5 toggles to S6
## Step on S5, S5 will be selected
## Step on S5 again, it will toggle back and forth between S6 and S5

# S6-S8 toggles to S5
## Step on S6, S6 will be selected
## Step on S6 again, it will toggle back and forth between S6 and S5
## Step on S7, S7 will be selected
## Step on S7 again, it will toggle back and forth between S7 and S5
## Step on S8, S8 will be selected
## Step on S8 again, it will toggle back and forth between S8 and S5


Let me know if you have any questions or find anything I need to fix. Enjoy!!!


Disclaimer:
I am not or ever been an employee, affiliate or have any connection with FAMC
I'm a FAMC customer that owns a LF+ PRO+, LF+ 12+, BE-2 and Phantom Power box
 
Last edited:
Let me know if you have any questions or find anything I need to fix. Enjoy!!!

First of all thank you, I head of horror stories about this pedal and I have one coming so knowing there's someone that made it work makes me feel better. I'll check your templates out and come with feedback if I have any or just show you what I've got :)
 
First of all thank you, I head of horror stories about this pedal and I have one coming so knowing there's someone that made it work makes me feel better. I'll check your templates out and come with feedback if I have any or just show you what I've got :)

Which model did you get? Did you get it new from FAMC or used? Let me know if you have any questions.

I also wrote this Tutorial. It's a little outdated but most of it still applies.
# FAMC Liquid Foot+: https://wiki.fractalaudio.com/wiki/index.php?title=FAMC_Liquid_Foot+

If you need me to remote into your PC, to show you how the Editor works, I usually give an hour free and then my hourly rate is whatever you make an hour.

FAMC's support and manuals are horrible but they did make great products and the last firmware update fixed most of the bugs.
 
First of all thank you, I head of horror stories about this pedal and I have one coming so knowing there's someone that made it work makes me feel better. I'll check your templates out and come with feedback if I have any or just show you what I've got :)
Easily one of the best ever pedal made and a pioneer copied by some. The horror stories are\were\whatever about the support and the website, not the hardware or software.
Just sayin so you know it's a great piece of hardware.
 
Which model did you get? Did you get it new from FAMC or used? Let me know if you have any questions.

I also wrote this Tutorial. It's a little outdated but most of it still applies.
# FAMC Liquid Foot+: https://wiki.fractalaudio.com/wiki/index.php?title=FAMC_Liquid_Foot+

I got this one, maybe you know the owner: https://reverb.com/item/34882593-liquid-foot-jr

Gonna try on my own but I appreciate there's a resource out there in case I end up bashing my head against a wall.
 
Great job you did... I have LF JR+ and tried a lot to upate Editor and connect to my JR+.
But Editor did not recognized the connection. This was reported to FAMC and they are
currently on investigation.. Actually, I have contemplated my JR+ pair with FM3 for use
with OMG9 Layout since my FC6 is getting well with my AXE3. However, programming
JR+ to that effect was hell absolutely beyond my capacities...finally gave it up....
Yours is first success of FAMC product work with AXE3 if my memory does not fail me.
Congratulation.... Mini display on your LF+ displays respective Scene names?
 
quick / stupid question: do I need to connect both MIDI in and out to the Axe FX to get all the functions of the controller to work?

Yeah, you do. Tuner and other functions that require feedback from the Axe Fx won't work otherwise. I built a custom splitter cable and used a 7pin midi cable. I ran power and 2 way midi from a single cable.

I had my Liquid Foot 12 for years. Recently upgraded to an FC-6. The LF software, especially the editor can be a bit buggy and difficult to understand. Once I got things setup, it always worked flawlessly. Editing and changing things was never fun though.

FC-6 is a different story. So easy to setup. And no bugs. 🐞
 
Yeah, you do. Tuner and other functions that require feedback from the Axe Fx won't work otherwise. I built a custom splitter cable and used a 7pin midi cable. I ran power and 2 way midi from a single cable.

Thank you, I suspected as much. And yeah, I can see already what you mean about the editor, not fun to look at but I wanted something that can work with either the Axe or other equipment and the FC-6 is too much money to use it just with one device. Honestly with all the money I spent on controllers I should have just kept the Helix Floor and use that as pedalboard :)
 
Thank you, I suspected as much. And yeah, I can see already what you mean about the editor, not fun to look at but I wanted something that can work with either the Axe or other equipment and the FC-6 is too much money to use it just with one device. Honestly with all the money I spent on controllers I should have just kept the Helix Floor and use that as pedalboard :)

Yeah, if you've got other gear, it totally makes sense. Once you get it setup, the Liquid Foot really is an incredibly powerful controller. The Fractal is the only thing I use these days, so it made sense for me to just buy the controller that works with it.
 
Great job you did... I have LF JR+ and tried a lot to upate Editor and connect to my JR+.
But Editor did not recognized the connection. This was reported to FAMC and they are
currently on investigation.. Actually, I have contemplated my JR+ pair with FM3 for use
with OMG9 Layout since my FC6 is getting well with my AXE3. However, programming
JR+ to that effect was hell absolutely beyond my capacities...finally gave it up....
Yours is first success of FAMC product work with AXE3 if my memory does not fail me.
Congratulation.... Mini display on your LF+ displays respective Scene names?
The LF+ does work with the Axe-FX III, and you can get Scene names to display on the mini displays.

The way I got it to work:

1) Connect MIDI in and out between the LF+ and the Axe FX III, and power them both up.
2) Connect your laptop and the LF+ with USB.
3) Open the LF+ editor software
4) If you have a base setup that you want to build on, open it in the SW. Otherwise, start with a blank setup. Send ALL to the LF+, as a Complete Transfer.
5) After the transfer is complete, turn the connection to the LF+ OFF, then back ON.
6) In the "Utilities" pull-down menu, select "External Device Sync".
7) At the top of the right half of the screen, pres the Detect Device/Model button. "Axe FX III" should appear in the test block to the right.
8) Select your method from the pulldown list. I found that "Presets->Presets; Scenes->IA-Labels" worked well.
9) Select the range of Presets in the Axe-FX that you want to sync with the LF+, by setting a Start and End Preset. Note that you have to select both of these, and the end must be greater than the start.
[BUG: The LF+ Editor software will only allow you to select from the lower 512 Presets in the Axe FX.]
[Note: If the Axe FX is set to a "0" PC offset, the Preset range will start at 1 less than the number you input here. For example, if you select the preset range of 100 to 150, you would actually get 99 to 149.]
10) Ensure that the three buttons below the range selection are all turned on (Preset Name, PC Messages, and Effect States).
11) Select the starting Preset in the LF+ that you would like to sync the Axe-FX Presets to. Make sure that you have enough room for the entire range that you selected.
12) Press the "Sync to LF+" button. Sit back and watch the Axe FX screen scroll through the Presets that you have selected. DON'T TOUCH ANYTHING ELSE UNTIL THE PROCESS HAS COMPLETED.
13) Once this process is complete, you will have a list of Presets that are sync'd to the Axe FX Presets, and a series of IA Slots that are sync'd to the FX blocks in use within those Presets. When you select them, you will also be able to use the IAs to select the appropriate FX blocks for the Preset, and both Presets and IA Scene selection assigned to a button will display the Scene names as programmed.
14) Scroll through the IA list and you'll see the FX blocks. These can be assigned to buttons in Pages, and will display as blocked, bypassed, on or off based on the state as set up in the Preset.
15) Now build 8 new IA slots, one for each Scene. Select a blank IA Slot. Use the Sync Device button to select Axe FX III. A new button will appear called "Sync Effect". In the pulldown list, scroll almost to the bottom and select "SCENE 1". A dialog box will ask if you want to Auto-Program this Effect - select "YES". Repeat this process 7 more times to build the set of 8, one for each Scene. [Hint: Now is a good time to save your work.]
16) Now, build IA slots for each Preset that you want to call directly from a Page Button. Each IA consists of two command steps. The first is a MIDI PC# command to select the Preset at the Axe FX. The second is a "Preset Trigger" for the corresponding Preset in the LF+. These IAs can be directly called from Buttons on Pages and will load all of the sync'd names and FX states. [BUG: In version 6.32, there is a problem with the Preset function when called direct from buttons in Pages. The combination of selecting Pages and using direct Preset buttons causes the Preset map to get out of sync with the Axe FX. The only way to fix it is to power down the LF+ and start over. DO NOT USE DIRECT PRESET BUTTONS.]
17) Next, build your pages.
You can set any button to load a SCENE by linking it to the IA "SCENE x" slot.
You can set any button to load a Preset by linking it to the IA slot that you built in step 16.
You can set any button to control a FX block by linking it to the IA slot that was automatically built in step 12.
The names shown on the display for all of these will be the names programmed in the active Preset.

That's it. This will give you a complete working setup that syncs between the Axe-FX III and the LF+.
 
Last edited:
The LF+ does work with the Axe-FX III, and you can get Scene names to display on the mini displays.

The way I got it to work:

1) Connect MIDI in and out between the LF+ and the Axe FX III, and power them both up.
2) Connect your laptop and the LF+ with USB.
3) Open the LF+ editor software
4) If you have a base setup that you want to build on, open it in the SW. Otherwise, start with a blank setup. Send ALL to the LF+, as a Complete Transfer.
5) After the transfer is complete, turn the connection to the LF+ OFF, then back ON.
6) In the "Utilities" pull-down menu, select "External Device Sync".
7) At the top of the right half of the screen, pres the Detect Device/Model button. "Axe FX III" should appear in the test block to the right.
8) Select your method from the pulldown list. I found that "Presets->Presets; Scenes->IA-Labels" worked well.
9) Select the range of Presets in the Axe-FX that you want to sync with the LF+, by setting a Start and End Preset. Note that you have to select both of these, and the end must be greater than the start.
[BUG: The LF+ Editor software will only allow you to select from the lower 512 Presets in the Axe FX.]
[Note: If the Axe FX is set to a "0" PC offset, the Preset range will start at 1 less than the number you input here. For example, if you select the preset range of 100 to 150, you would actually get 99 to 149.]
10) Ensure that the three buttons below the range selection are all turned on (Preset Name, PC Messages, and Effect States).
11) Select the starting Preset in the LF+ that you would like to sync the Axe-FX Presets to. Make sure that you have enough room for the entire range that you selected.
12) Press the "Sync to LF+" button. Sit back and watch the Axe FX screen scroll through the Presets that you have selected. DON'T TOUCH ANYTHING ELSE UNTIL THE PROCESS HAS COMPLETED.
13) Once this process is complete, you will have a list of Presets that are sync'd to the Axe FX Presets, and a series of IA Slots that are sync'd to the FX blocks in use within those Presets. When you select them, you will also be able to use the IAs to select the appropriate FX blocks for the Preset, and both Presets and IA Scene selection assigned to a button will display the Scene names as programmed.
14) Scroll through the IA list and you'll see the FX blocks. These can be assigned to buttons in Pages, and will display as blocked, bypassed, on or off based on the state as set up in the Preset.
15) Now build 8 new IA slots, one for each Scene. Select a blank IA Slot. Use the Sync Device button to select Axe FX III. A new button will appear called "Sync Effect". In the pulldown list, scroll almost to the bottom and select "SCENE 1". A dialog box will ask if you want to Auto-Program this Effect - select "YES". Repeat this process 7 more times to build the set of 8, one for each Scene. [Hint: Now is a good time to save your work.]
16) Now, build IA slots for each Preset that you want to call directly from a Page Button. Each IA consists of two command steps. The first is a MIDI PC# command to select the Preset at the Axe FX. The second is a "Preset Trigger" for the corresponding Preset in the LF+. These IAs can be directly called from Buttons on Pages and will load all of the sync'd names and FX states. [BUG: In version 6.32, there is a problem with the Preset function when called direct from buttons in Pages. The combination of selecting Pages and using direct Preset buttons causes the Preset map to get out of sync with the Axe FX. The only way to fix it is to power down the LF+ and start over. DO NOT USE DIRECT PRESET BUTTONS.]
17) Next, build your pages.

The names shown on the display for all of these will be the names programmed in the active Preset.

That's it. This will give you a complete working setup that syncs between the Axe-FX III and the LF+.

Please do not follow these instructions. I thank @FullThrottle64 for trying to be helpful but these instructions are not the correct way to setup a LF+ for an Axe-Fx III or Axe-Fx II. FullThrottle64's instructions will not allow Preset names, Scene names or Block status's to sync in real-time properly and will cause excessive MIDI data traffic which could cause the LF+ or Axe-Fx III to freeze.

Please install my Template listed at the top of this thread or the default one that comes with the LF+ Editor for the Axe-Fx III. The default template included with the LF+ Editor does have some incorrect settings but will real-time sync Preset names, Scene names and Block status's.
Scene and Preset names are syncing for me in real-time. Why would you think that they will not? [Edit: I went back and double-checked, and they are indeed syncing as I would expect.]

The default template does not cover presets above 384. For my use, I leave the first 384 factory presets in place for reference, then start my own list at #400. As a result, the default template doesn't do me very much good, so I went about figuring out how to make it work......?

Is there a specific setting that you think I got wrong, and if so, which one and why? What would cause excessive MIDI traffic?
 
Last edited:
Scene and Preset names are syncing for me in real-time. Why would you think that they will not? [Edit: I went back and double-checked, and they are indeed syncing as I would expect.]

The default template does not cover presets above 384. For my use, I leave the first 384 factory presets in place for reference, then start my own list at #400. As a result, the default template doesn't do me very much good, so I went about figuring out how to make it work......?

Is there a specific setting that you think I got wrong, and if so, which one and why? What would cause excessive MIDI traffic?

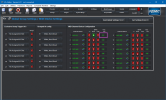
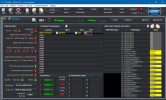
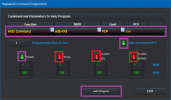
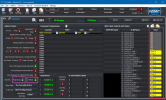
All the screenshots below are referenced from my Axe-Fx III Template. Also, the MIDI Sysex data is exactly the same for the Axe-Fx III MK1 and MK2, so no programming changes need to be made to the LF+.


-------------------------------------------------------------------------------

This is how you set the maximum presets for a device:

How to set max preset number.png


-------------------------------------------------------------------------------

This is how you set Program Change Numbers "PC#" in LF+ presets to select presets on a device (Note: Program Change Numbers "PC#" start at 0, which depending on the device's settings, may select Preset 0 or Preset 1 on the Device):

How to set program change number.png


-------------------------------------------------------------------------------

This is how you quickly set LF+ Presets 1 to 384 to select Axe-Fx III Presets 385 to 512:

How to set LF+ Presets 1-384 to select AF3 Presets 385-512.png


-------------------------------------------------------------------------------

If the settings "Preset Name" and "IA Effects" in Purple boxes are enabled in a LF+ Preset, Real Time sync is enabled for Preset Names and IA States, which will cause the LF+ main display to show the preset name from the Axe-Fx III Preset, no matter what is programmed into the LF+'s Preset Full Name and Nick Name. All IA's will show the Axe-Fx III block states, Channel A, B, C, D state, which Scene is selected and the Scene names. If the Axe-Fx III Block is On, the LF+ IA button display will be Green. If the Axe-Fx Block is Bypassed, the LF+ IA button display will be Red. IA state colors can be changed to any of the available 7 Dim/Bright colors or Off(Blank) in the LF+ IA-Slot settings but the Defaults are On=Green, Bypass=Red, Off=Off(Blank), Blocked=Off(Blank).

If there is a LF+ IA button on a LF+ Page that isn't in the current selected Axe-Fx III preset, the LF+IA button display will be Blocked=Off(Blank).

If the LF+ Preset's "IA Effects" setting is enabled, DO NOT change any of the LF+ Preset's IA States in the Red box that are programmed for Axe-Fx III Blocks, Channels or Scenes and leave them in the "Off" State and "Chan A" State. The reason you don't want to change the LF+ Preset's IA States is because when you select a LF+ Preset, it sends and receives MIDI Sysex data to query the Axe-Fx III to get the current Axe-Fx III preset info and automatically sets the LF+ IA button displays. If you change the LF+ Preset's IA States, it will cause excessive MIDI data traffic because the LF+ will send and receive MIDI Sysex data and sync to the current selected Axe-Fx III preset and then the LF+ will send MIDI CC data to the Axe-Fx III to manually set the current Axe-Fx III's preset blocks to the LF+ IA States that were changed from the Default "Off" State. This will also cause the LF+ to ignore the Axe-Fx III preset's block states and manually change them to what was set in the LF+ Preset's IA States. This is why some people complain that the LF+ changes their Axe-Fx presets or makes them sound different but the Axe-Fx presets work and sound correct when the LF+ is not connected.

Excessive MIDI data traffic could also cause the LF+ or Axe-Fx III to freeze, needing to power cycle both of them.

Example:
If you have an Axe-Fx III preset set to:
Scene 2 Named: Verse
Amp 1=On/ChB
Drive 1=Bypass/ChC

If you have a LF+ Preset with IA States set to:
Scene 1 to 8=Off
Amp 1=Bypass/ChA
Drive 1=On/ChD

The Axe-Fx III preset will get set to:
Scene 2 Named: Verse
Amp 1=Bypass/ChA
Drive 1=On/ChD

If you have a LF+ Preset with IA States set to:
Scene 3=On
Amp 1=On/ChD
Drive 1=Bypass/ChA

The Axe-Fx III preset will get set to:
Scene 3 - The LF+ IA button displays may not sync correctly because they will initially try to sync to Scene 2 and may not sync when Scene 3 is selected by the IA State
Amp 1=On/ChD - This will probably be unpredictable and may get set to what the Axe-Fx III Preset's Scene 2 or 3 is set to
Drive 1=Bypass/ChA - This will probably be unpredictable and may get set to what the Axe-Fx III Preset's Scene 2 or 3 is set to

If Real Time Sync is enabled do NOT set IA States and leave Off.png


-------------------------------------------------------------------------------

Let me know if you have any other questions.


Thanks,
Lou
 
Last edited:
-------------------------------------------------------------------------------

This is how you set Program Change Numbers "PC#" in LF+ presets to select presets on a device (Note: Program Change Numbers "PC#" start at 0, which depending on the device's settings, may select Preset 0 or Preset 1 on the Device):

View attachment 80198
This did not work for me.

Whenever I tried to call up a preset from a page button, it would introduce an offset in the LF+ that was out of sync with the Axe-FX III.

This worked fine when I put it as the first line in a IA slot and then triggered the preset as the second line in the IA.
 
-------------------------------------------------------------------------------

If the settings "Preset Name" and "IA Effects" in Purple boxes are enabled in a LF+ Preset, Real Time sync is enabled for Preset Names and IA States, which will cause the LF+ main display to show the preset name from the Axe-Fx III Preset, no matter what is programmed into the LF+'s Preset Full Name and Nick Name. All IA's will show the Axe-Fx III block states, Channel A, B, C, D state, which Scene is selected and the Scene names. If the Axe-Fx III Block is On, the LF+ IA button display will be Green. If the Axe-Fx Block is Bypassed, the LF+ IA button display will be Red. IA state colors can be changed to any of the available 7 Dim/Bright colors or Off(Blank) in the LF+ IA-Slot settings but the Defaults are On=Green, Bypass=Red, Off=Off(Blank), Blocked=Off(Blank).

If there is a LF+ IA button on a LF+ Page that isn't in the current selected Axe-Fx III preset, the LF+IA button display will be Blocked=Off(Blank).

If the LF+ Preset's "IA Effects" setting is enabled, DO NOT change any of the LF+ Preset's IA States in the Red box that are programmed for Axe-Fx III Blocks, Channels or Scenes and leave them in the "Off" State and "Chan A" State. The reason you don't want to change the LF+ Preset's IA States is because when you select a LF+ Preset, it sends and receives MIDI Sysex data to query the Axe-Fx III to get the current Axe-Fx III preset info and automatically sets the LF+ IA button displays. If you change the LF+ Preset's IA States, it will cause excessive MIDI data traffic because the LF+ will send and receive MIDI Sysex data and sync to the current selected Axe-Fx III preset and then the LF+ will send MIDI CC data to the Axe-Fx III to manually set the current Axe-Fx III's preset blocks to the LF+ IA States that were changed from the Default "Off" State. This will also cause the LF+ to ignore the Axe-Fx III preset's block states and manually change them to what was set in the LF+ Preset's IA States. This is why some people complain that the LF+ changes their Axe-Fx presets or makes them sound different but the Axe-Fx presets work and sound correct when the LF+ is not connected.

Excessive MIDI data traffic could also cause the LF+ or Axe-Fx III to freeze, needing to power cycle both of them.

Example:
If you have an Axe-Fx III preset set to:
Scene 2 Named: Verse
Amp 1=On/ChB
Drive 1=Bypass/ChC

If you have a LF+ Preset with IA States set to:
Scene 1 to 8=Off
Amp 1=Bypass/ChA
Drive 1=On/ChD

The Axe-Fx III preset will get set to:
Scene 2 Named: Verse
Amp 1=On/ChB
Drive 1=Bypass/ChC

If you have a LF+ Preset with IA States set to:
Scene 3=On
Amp 1=On/ChD
Drive 1=Bypass/ChA

The Axe-Fx III preset will get set to:
Scene 3 - The LF+ IA button displays may not sync correctly because they will initially try to sync to Scene 2 and may not sync when Scene 3 is selected by the IA State
Amp 1=On/ChD - This will probably be unpredictable and may get set to what the Axe-Fx III Preset's Scene 2 or 3 is set to
Drive 1=Bypass/ChA - This will probably be unpredictable and may get set to what the Axe-Fx III Preset's Scene 2 or 3 is set to

View attachment 80199
This section is really helpful - thanks!
 
This did not work for me.

Whenever I tried to call up a preset from a page button, it would introduce an offset in the LF+ that was out of sync with the Axe-FX III.

This worked fine when I put it as the first line in a IA slot and then triggered the preset as the second line in the IA.
Can you share your LF+ programming file?

Something must be misconfigured either in your Axe-Fx III or LF+. If you change the name of a preset or the name of a scene or the state of a block in one of your Axe-Fx III presets (Not the LF+) and save it, does the LF+ automatically show the changes when you step on a button to select the changed Axe-Fx III preset?

IA's aren't presets, so I don't understand how one could sync an Axe-Fx III preset name. You can manually name an IA the name of an Axe-Fx III preset and assign a PC# in the IA programming to select an Axe-Fx III preset but it won't know how to sync. If you have the PC# command and the "Preset trigger" command in an IA, that doesn't make sense because that would send a PC# to select an Axe-Fx III preset and then select a LF+ Preset that would send another PC# to select an Axe-Fx III preset, so you'd be sending 2 PC# commands in a row.

When you assign Preset B#11 to a button on a Page, that's not assigning LF+ Preset 011 or Axe-Fx III Preset 011 to that button. It's assigning the 11th preset in a bank of presets. If you assign Preset B#01 and Preset #02 to a page and in bank 1, they will select LF+ Preset 001 and Preset 002. If you bank up 1, they will select LF+ Preset 003 and Preset 004. A bank size is determined by the highest Preset B# on the Page. If you only have Preset B#02 and Preset B#11 assigned to a Page then bank 1 will select LF+ Preset 002 and Preset 011. Bank 2 would select LF+ Preset 013 and 022. Bank 3 Preset 024 and 033 etc.

Also, when programming Presets in the LF+ you don't have to assign PC#'s sequentially and can assign Preset 001 to send PC# 10 and Preset 002 to send PC# 400. I program my LF+ Presets sequentially and then put the LF+ into Song Mode which changes LF+ Preset Banks into Songs and then program Songs with LF+ Presets in any order I need for the song. Then I program Set lists to put my Songs in any order I need, so when I bank up, Songs don't have to be selected sequentially either.
 
Back
Top Bottom