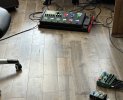
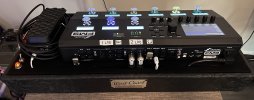
So here's a shot of my new baby. Setup as follows
Left 2 external buttons - single press for Presets layout and FX layout
Preset layout is bank of 8 presets - top right single press +1 bank, long press -1 bank. Tap any preset and it takes you to Scenes layout.
Scenes layout - All 8 scenes are accessible via single press. Bottom right button is Tap/Tuner. The button label shows long-press function (Mostly lifted from Austin Buddy's CS assignments). MP on the top right toggles Multiplexer to switch from Wah to Whammy. Loop takes you to Looper layout which has single button access back to Pesets or Scenes layouts.
If anyone is interested, I'll upload layouts so you can tweak to make it yours.
View attachment 135353