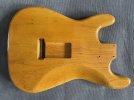
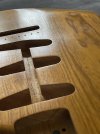
How to make a Fender style relic.

Andy Eagle

Fractal Fanatic
This came up in my 5150 build thread as I am up to the relic element of the build. I also have a 61 strat replica on the go that this will come up as well but as I am waiting for the necks to finish both builds I though I could use this.
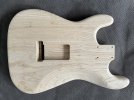
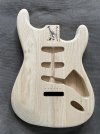
This is a maple Allparts neck and a UK Guitar Build swamp ash 50s two piece body. The customer wants a moderate relic nitro two tone sunburst early 50s style and a reasonably aged maple neck fitted out with 54/5 appointments.
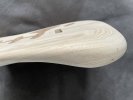
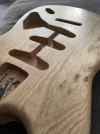
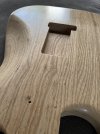
The body is very nice as UK guitar build bodies usually are. I.7Kg off centre joined two piece made to fit USA imperial measurement parts perfectly. I find these to be the most accurate vintage speck bodies you can buy. The contours are fairly middle of the pile in depth and style for this era so that is OK for this build but you could always cut them deeper at this stage.IMG_1978.jpg
 
Last edited:
The Neck;
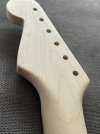
I would not normally use an Allparts neck but there is nothing wrong with them if they make your speck and you don't mind the additional work to get them up to speed . These are also sold unbranded as Hosco necks ,identical products.
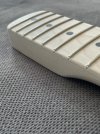
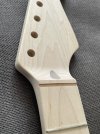
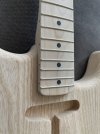
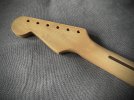
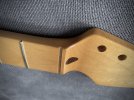
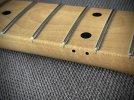
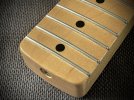
On this job I would have to start with fixing the contours, transitions and rolling the fingerboard edges as well as the head for an early Strat look.
IMG_1971.jpg
IMG_1972.jpg
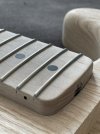
IMG_1970.jpg
 
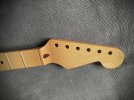
Al so you can see the first pass at the fret dress done as well. This neck is now ready to finish .
I would be using two tints and clear to add discolouration .
FullSizeRender.jpg
FullSizeRender.jpg
You can see the effect I was going for so that when you add the damage and hardware it will help bring together the look.
FullSizeRender.jpg
 
The first elements are in place for the wear and the fret polish.
I generally don't just leave the majority of the back of the neck with no finish as most seem too.
FullSizeRender.jpg
FullSizeRender.jpg
I can't emphasise enough how important it is to get the paint right first.
Oh and these frets are only half finished here.
 
Last edited:
I have the paint on order for the body and will do a two tone sunburst on it as soon is it arrives.
I will also need to do a diluted grain filler coat first .
Also I will need to let the neck dry for at least a week before I can even attempt the checking.
 
Last edited:
I can start the fingerboard wear as I wait for the other things.
First find a good picture to work from. Something not too much and that looks good in your opinion ,do not work from other relics no matter how good you think they look because it tends to produce unreal wear patters that go like Chinese whispers .
Here is a link to a moderate use 54, nothing to much or unbelievable .
1954-fender-stratocaster
When you work from pictures start with less and work your way to what looks real not an exact copy of the picture (that is a whole other problem.)
Feel free to stop at less or keep going at it if you are liking the look.
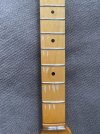
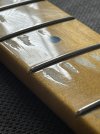
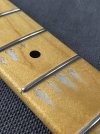
For this job I use a round nosed scalpel blade to gently scrap the finish thinner without too many scratch lines. Then when you have the bulk or the job done swap to 0000 wire wool to polish the scrapes and replicate the action of your fingertips smoothing the fingernail divots over time.
IMG_1983.jpg
This is a less than the link, start using that guitar as a rough guide to the particular places and rough shapes. This is the bit when it looks bad however well you are actually doing.
 
Last edited:
Then you use a cutting polish to loose some of the scratching and replicate finger rubbing, and finally add a bit of graphite powder for colour.
At this stage it will look like this;
IMG_1984.jpg
In context with the guitar built and some checking and a few minor marks to the headstock this will look pretty convincing.
All the elements that you have to do one at a time combine, The correct transitions in the sanding. The uneven discolouration that you did in the paint (copied from photos.) The fingerboard wear. The checking , then a few minor dings and scratches and a vintage accurate logo ( screen printed).
 
Last edited:
Always interesting to see how people go about relic builds, so many different techniques

I personally have done checking in the Lacquer by rapid temperate changes, usually get it really cold with compressed air duster, then hit the the heat gun and it gets a nice spider web checking ala 40+ years of seasonal changes lol
I do the exact opposite and use a hair dryer because I don't want it to go too hot.
 
While the neck is hardening up I can make a start on the body.
First job is dilute a bit of spirit based grain filler and rub in to the open pores . If you look at disassembled vintage 50's Fenders a lot don't have filler or at least hardly any in the space that will be under the scratch plate so I like to copy that with mine.
After you have done this and left it to thoroughly dry ( overnight in a warm place ) then you can finish sand it ready for sanding sealer.
Yes I know this seems far more the that would have done at Fender but we are going for thin and with a small deliberate sink.
I then spray couple of coats on and leave overnight .
At this point you can look for bits that need a bit more filling and rub a bit in before you finish the sealer coat.
You are looking for the same profile of flat that you want in the final look or pretty close because there will not be much in the colour coats to wet sand.
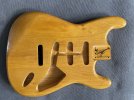
I want this kind of look in a relic;IMG_1986.jpg
I hope you can see that this looks pretty flat with a hint of grain.
 
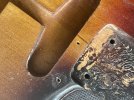
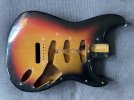
You can see that things changed quit a bit by the second pic. The alder was painted with fuller-plast clear sealer over amber stain which formed the base coat of all Strats of this era. This meant one of the tints coats could be missed out . The process here was just to paint a black solid colour around the edge first. Then the trans red and clear. The amber was the stain under the filler and as you can see often the red did not go under the scratch plate .

The top picture is a late 50s with a nitro sealer, amber tint , tobacco brown (slightly trans) and trans red also missing under the scratch plate . This was obviously more costly and time consuming.

The early 50' missed out the red but had a grain filler stage .
Failure sunbursts became the base coat for custom colours particularly black as no clear would needed due to the substantial base layer .
 
Last edited:
Still keeping a not perfectly flat look;
IMG_1990.jpg
It would be pretty easy to put a few extra coats of clear on at the end and get it perfect but that won't look right as the start of a relic. I will only put on a couple of clear coats and then only hand buff with rubbing compound and cutting polish.
Next up is the burst .
 
Back
Top Bottom