...or did you actually start from scratch from a block of wood ?
Not quite, although I do have a colleague with a CNC machine, so I guess I could have started with a block of wood.
")
Here's the breakdown;
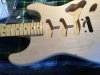
Alder Strat Body
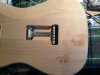
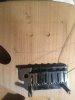
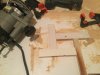
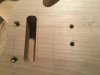
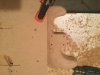
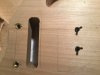
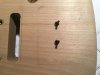
Found a Luthier on Kijiji, a few hours away from me selling the body for a $100 CDN. I believe it was milled back in 2008 or even earlier, by a shop in California, to exact Fender specs. The wood had been drying for a couple years before that, so it's nice and dry and stable. Looks like it's made from two pieces of Alder. I figured it was the least expensive route (pardon the pun) to take, just in case I screw up...well, the route for the circuit board. It also didn't have any holes drilled in it to mount the bridge. I wanted a two point modern trem, w/ the pop-in arm, so it allowed me to install one. It was a bit tricky trying to determine where to drill the holes for the bushings, but as you can see in the picture, I used the two E strings to help me line it up. I also had to make some test holes in a piece of wood to determine the bushing diameter. I don't have a drill press, so I took my time, working my way up in drill bit sizes to make sure the holes were vertical. I used the inside of the bushings as a guide for the drill bit.
Fender American Special Neck (U.S.)
It's an American Special neck I bought on Reverb, with the large 70's style headstock, which I like. The grain and tint on it is really nice too. It has 22 frets instead of 21 and jumbo frets instead of medium jumbo, which I wanted, but now that I've had a chance to 'play' the two strings on it, I can't even tell the difference, It's a modern C profile, which I like as well. I may remove the 22nd fret, but that will require some repair work to hide part of the slot that would remain. I think I figured out a way to do it so you would never know. Not sure yet.
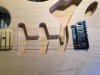
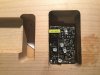
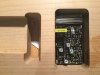
Fernandes FSK 401 Sustainer Kit
I bought it on Reverb for a really good price. It had never been installed.
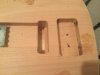
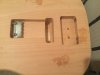
Pickguard/Knobs/Trem. Cover
Standard Fender parts I bought from a guitar shop online.
Fender Ultra Bridge/Pop-in Arm./Claw/Jack/Springs/Screws etc.
Bought a whole pack with everything I need on Reverb.
S.D. Hot Rail Pickups.
Bought the bridge and middle pickup on Kijiji for about $100 CDN.
I'm going to assemble it all first, then I'll take it apart and paint it Inca Silver. Haven't decided if I'm going to use a lacquer finish or poly.
 IMG_0304.JPG108.9 KB · Views: 103
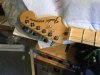 IMG_0307.JPG119.7 KB · Views: 101
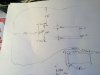 IMG_0308.JPG74.3 KB · Views: 106
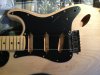 IMG_0311.JPG111.7 KB · Views: 104
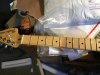 IMG_0312.JPG121.6 KB · Views: 94
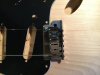 IMG_0313.JPG101.1 KB · Views: 100
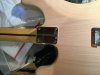 IMG_0315.JPG98.1 KB · Views: 97
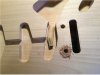 IMG_0309b.jpg120.2 KB · Views: 97
 IMG_0310b.jpg147.4 KB · Views: 102
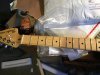 IMG_0312b.jpg122.3 KB · Views: 99