NGBD - New Guitar Build Day

Thank you, thank you
And here, the continuing story of the Sister of the Blue Pointed Thing.

Chris hit a snag.
When he wanted to install the Sure Claw, the screws would protrude into the neck pickup cavity.
What to do????
Chris:
Rather than have two screws going up from the back of the cavity into the middle pickup space I decided the tap a tread into the claw and use M5 machine crews from the pickup side. This effectively clamps the claw to the wood. I also drilled three small holes into the front of the claw which allow me to screw the claw in place as well but screwing into the full width of the body.
64+-+machinescrews.jpg

65+-+fitted.jpg


So now I only need to insert an allan key through a small hole to adjust the Sure Claw:
66+-+hole.jpg


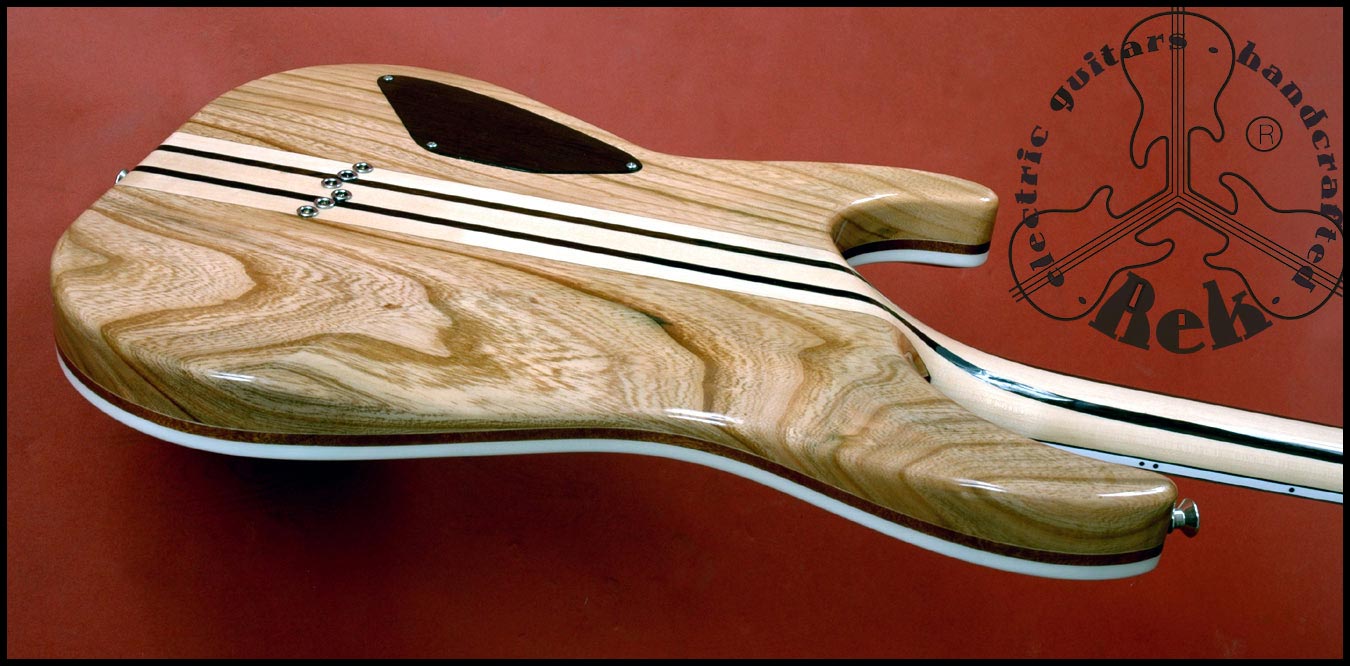
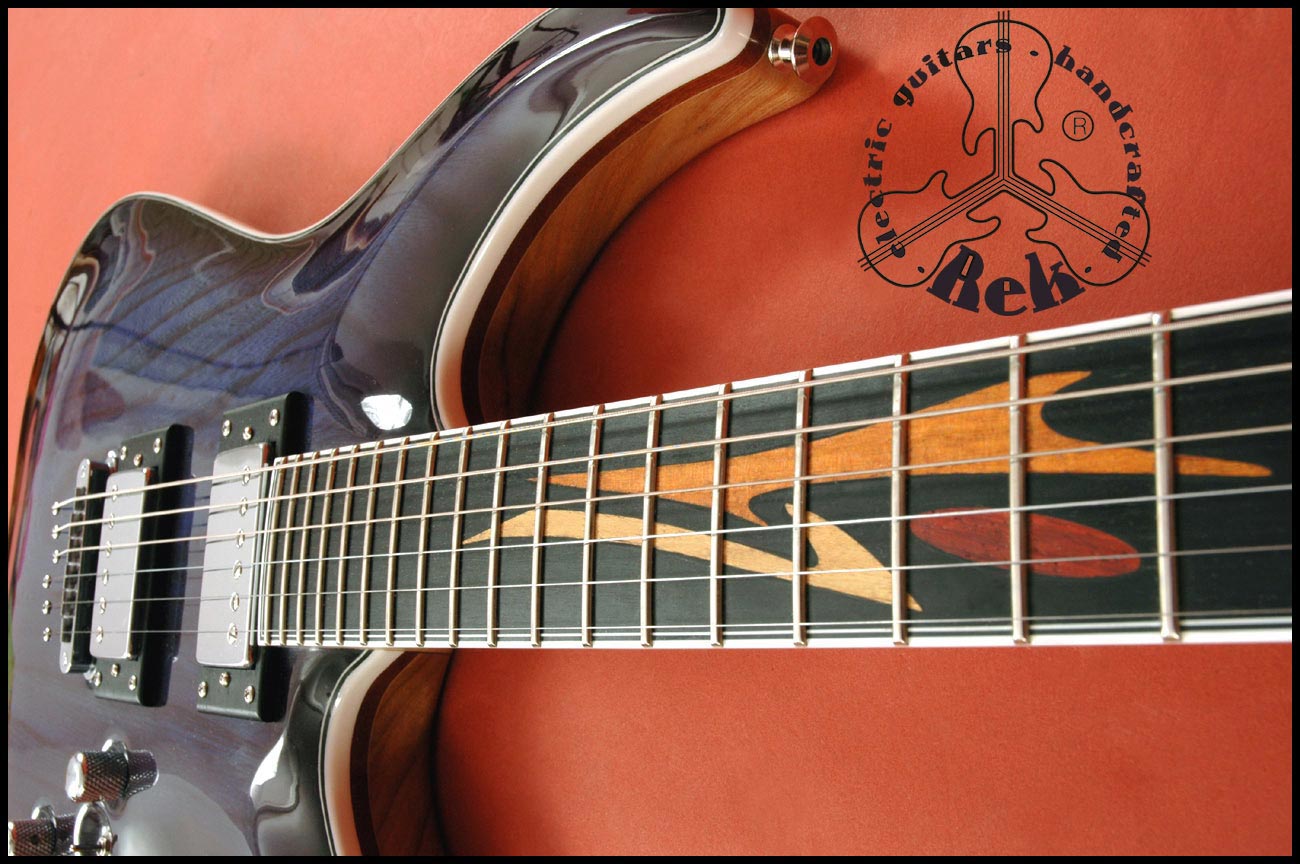
Chris aplied a few coats of lacquer:
67+-+back.jpg
68+-+face.jpg
 
That's funny. I never heard of Chris Larkin until a week ago when a client brought in a solid body ASAD Chris Larkin guitar for a fret dressing. It's a beautiful instrument, and looking at the photos, I'm sure yours will be at least as good!
 
And here we are with some more news.
Chris put on the 3mm masking tape for the "faux binding" as he calls it:
69+-+fauxmasking.jpg


Chris:
Four coats of blue gave the sunburst which I'm happy with. I only took the pictures a couple of minutes ago so the light was not great (fluorescent) and the colour is more vivid in real life. I sunbursted the headstock too.

70+-+back.jpg


71+-+face.jpg
 
Thanks for sharing this thread.

It gives me a real appreciation for what goes in to building one of these. Your guitar is beautiful.
 
Subscribed!!!!

Does he carve/plane/file the back of the neck by hand???
I can't even imagine what the neck would look like if I tried to do that.

This is an awesome build...I love the trans-blue.
 
Chris:
I took off the masking yesterday morning and had to do a bit of micro scraping to tidy up some of the curves but basically it is looking good.Last night I sprayed three more coats and tonight I will give it a slight rub with some fine abrasive to 'de-nib' it and then apply the final finishing coats.

73+-+thatworked.jpg
 
Nice guitar! I like seethru blue...
Having a custom made is really exciting and fun. Plan features and decide about everything before you get to that moment when the box arrives at home and you open it for the first time. Nothing beats that feeling!
I had one made by the Polish luthiers Rek Guitars, also a see thru Blue... It's even called Ztevie's Blue. :)

0d.jpg

9.jpg

1.jpg
 
Last edited:
Just received a few pics of Chris polishing my geetar.
But I found this in one of his old newsletters: an explanation about how he gets that deep gloss finish!!
Chris:
Somebody was looking at a gloss finish in the workshop and asked that question so here is how I do it. After many coats of lacquer (up to 20 which are sanded back every third coat over about a week) I have built up a fairly flat layer of clear, gloss lacquer onto the wood. This is left to cure (harden) for at least a week at about 25 degree C.
001.jpg

If you look at the pic below you can see that although it is quite shiny the surface is pimpled from the action of the spraygun.
002.jpg

So the next thing is to level this by sanding first with 600 grit and then with 1200 grit wet and dry abrasive paper. I do this by hand using a lubricant of water with wash-up liquid in it. The lubricant helps prevent the abrasive from removing too much of the lacquer surface and washes away the slurry that is removed.
003.jpg

You can see the way it looks after each process below. First after 600 grit
004.jpg

Then after 1200 grit.
005.jpg

Now I have a flattened and semi matt surface I go through a 3 stage polishing process. I use a purpose built double ended buffing machine with 10 " (250mm) cotton buffs. There are two buffs together on each end that gives me a good polishing area for flat surfaces.
006.jpg

For getting into tight curves and smaller areas I remove one buff. I have three grades of polishing compound - left to right, coarse, medium and fine. The compound has abrasive particles of different sizes embedded in waxy blocks
007.jpg

With the buffing machine running holding the compound bar against the wheel will transfer the abrasive to the wheel surface and then the guitar can be held against the wheel and the polishing starts.
008.jpg


It is important to move the guitar all the time as polishing in one place will cause a build up of heat that will cause the lacquer to bubble and break up. Also you must always buff from the centre towards an edge. There is 3/4 hp motor driving the wheels so if you work the other way the wheel will catch the guitar and tear it from your grip throwing it on the floor - and yes, it has happened to me. I frequently add more compound to the wheel and press less against the wheel as I progress. I use a specific set of wheels for each grit so that I don't accidently mix the compounds and I use the reflection of overhead fluorescent lamp as a guide to the quality of finish. Here are shots taken after each round of buffing and I hope you can see the difference!
009.jpg

010.jpg

011.jpg

012.jpg
 
So this is what Chris wrote today:
I finished polishing and removing the lacquer from the frets on your guitar last night at 2200hrs so this morning should start putting the bits on it (hopefully in the correct places) and it might talk to me if I'm nice to it. A secret. I'm always really scared of the wet and dry sanding and the polishing so I try not to do it. But in the end I have to. It is just so easy to either rub through the lacquer and the colour layers with the abrasive or do the same thing with the polishing wheels and then there is no quick solution - you have to sand back to wood and re-spray if there is even the smallest fault. Don't ask me how I know this!

Some pics. More tomorrow.
I'm looking forward to it.

76%2520-%2520wetanddry.jpg


77%2520-%2520polish.jpg


78%2520-%2520cleanfrets.jpg
 
Back
Top Bottom