scotts
Inspired
It occurred to me that the biggest things bothering me about my FCB are (were):
-the width of the unit both for transporting and in use
-the feel and fixed position of the expression pedals
So I took out my trusty hacksaw and carved the thing.
Steps:
1) Remove back cover (cut large ground wire).
2) Remove transformer. Cut yellow wires and leave them long.
3) Cut LED leads to expression pedal (have to give those up).
4) Cut each group of three expression pedal wires at the pedal side.
5) Measure 1/4" from the center of the back plate screw holes (nearest the Bank switches) to the side the expression pedals are on. Mark a line along these points and saw/chop/cut the unit in two. The black plastic side piece will fit on the side that was just cut and if you are careful the screw holes will line up as well. The rubber feet will need to be repositioned/replaced.
6) Drill a small hole wherever you like and install a female power jack. Attach the two yellow wires to this (either way). The unit will now power off of any 9-10V AC or DC wall wort.
________________________
7) (Optional) Drill two holes and install two female stereo jacks. Tie off the red/black/black from each expression pedal control wire group to these jacks. Use for external continuous controllers.
EDIT: ************I just tried to use the CC feeds with external pedals. As near as I can tell at this point the CC wire feeds send a signal that is only appropriate for the on board controllers. Oh well.************
________________________
8) (Optional) Purchase a Rocktron 5 to 7 pin MIDI cable (the one with the power jack on the five pin side). Plug the wall wart in at the Axe location and jack it into the phantom input. Plug the 7 pin side of the cable into the Axe. Plug the 5 pin side into the FCB and plug the power jack into the FCB with a small adaptor cable (or install a male end on the Rocktron cable). The FCB is now phantom powered.
Total project time: 1-1/2 hours
My FCB1010 now fits in my storage rack case and feels better to me on stage. It will soon be relegated to back-up status but it no longer pisses me off.
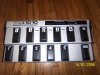
(The date on the picture says 2006. I don't know how to change the year on my old camera and I don't care to learn).
-the width of the unit both for transporting and in use
-the feel and fixed position of the expression pedals
So I took out my trusty hacksaw and carved the thing.
Steps:
1) Remove back cover (cut large ground wire).
2) Remove transformer. Cut yellow wires and leave them long.
3) Cut LED leads to expression pedal (have to give those up).
4) Cut each group of three expression pedal wires at the pedal side.
5) Measure 1/4" from the center of the back plate screw holes (nearest the Bank switches) to the side the expression pedals are on. Mark a line along these points and saw/chop/cut the unit in two. The black plastic side piece will fit on the side that was just cut and if you are careful the screw holes will line up as well. The rubber feet will need to be repositioned/replaced.
6) Drill a small hole wherever you like and install a female power jack. Attach the two yellow wires to this (either way). The unit will now power off of any 9-10V AC or DC wall wort.
________________________
7) (Optional) Drill two holes and install two female stereo jacks. Tie off the red/black/black from each expression pedal control wire group to these jacks. Use for external continuous controllers.
EDIT: ************I just tried to use the CC feeds with external pedals. As near as I can tell at this point the CC wire feeds send a signal that is only appropriate for the on board controllers. Oh well.************
________________________
8) (Optional) Purchase a Rocktron 5 to 7 pin MIDI cable (the one with the power jack on the five pin side). Plug the wall wart in at the Axe location and jack it into the phantom input. Plug the 7 pin side of the cable into the Axe. Plug the 5 pin side into the FCB and plug the power jack into the FCB with a small adaptor cable (or install a male end on the Rocktron cable). The FCB is now phantom powered.
Total project time: 1-1/2 hours
My FCB1010 now fits in my storage rack case and feels better to me on stage. It will soon be relegated to back-up status but it no longer pisses me off.
(The date on the picture says 2006. I don't know how to change the year on my old camera and I don't care to learn).
Attachments
Last edited:

