schemers
Member
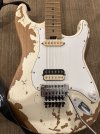
Thought I'd post the evolution of my Charvel Henrik Dhanages.
First one is tuned to standard and followed this path (corresponding to charvel1-charvel4 images):
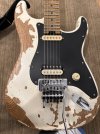
The second one (charvel5) is tuned down half a step with the same layout as (2) but with a black pickguard, and I recently added a 470K resistor to the neck pickup which helped with taming the treble on it. I still might dump the push/push on it, maybe by adding a toggle where the tone knob would be.
I'm toying with adding a treble bleed circuit on them, since they get a little muddy with the volume rolled down, but not sure. Any suggestions on what might work best are definitely welcome!
Also tempted to just sand the paint off the black one so it is just natural...
First one is tuned to standard and followed this path (corresponding to charvel1-charvel4 images):
- original layout, original volume knob (push/push for pickup selection)
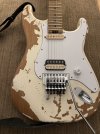
- new HS pickguard, moved volume knob (same push/push)
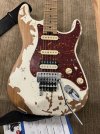
- new HSS pickguard, added middle pickup (DiMarzio Area 67, same as neck, 5-way switch, tone wired only to neck/middle pickups)
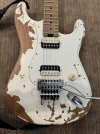
- new HH pickguard, Seymour Duncan 59 in neck, 3-way switch
The second one (charvel5) is tuned down half a step with the same layout as (2) but with a black pickguard, and I recently added a 470K resistor to the neck pickup which helped with taming the treble on it. I still might dump the push/push on it, maybe by adding a toggle where the tone knob would be.
I'm toying with adding a treble bleed circuit on them, since they get a little muddy with the volume rolled down, but not sure. Any suggestions on what might work best are definitely welcome!
Also tempted to just sand the paint off the black one so it is just natural...