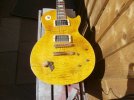
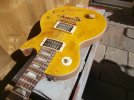
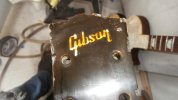
Project 600 Les Paul.

Hi @BBN thank you for the kind words.

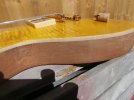
The binding is simply the paint scraped off the maple top so is actually the maple. It is a common trick to do on a Studio when you refinish them.
I made a very simple tool to do this which I will take a photo of to share (probably tomorrow).
Wow, had no idea. Almost makes me want to buy a studio and strip it!
 
I dragged the guitar out from the loft today to find that I had grain-filled the rear and not sanded it off! Months ago!
I started to sand it but almost instantly ran out of sanding discs of a suitable grade so I had to stop work and order some discs online.

Once they arrive work will progress with some new pictures.
 
Wow, had no idea. Almost makes me want to buy a studio and strip it!
Pretty much every figured top Suhr, Anderson, PRS, etc has a scraped (natural) "binding".

My first exposure to it was way back in the 90s when I bought an Ibanez SC420 in a solid black cherry finish. It's very striking!

Here is a Reverb listing of one that has some good shots of what they look like (I'm too lazy to dig mine out and take pictures :)):

https://reverb.com/item/10607110-ib...are&utm_campaign=listing&utm_content=10607110
Makes total sense.
Just never registered with me that sanding down a Studio could expose a cap that creates the look of binding.
I like the look of a 'wood binding' better too.
 
The weather has turned against me and it is too cold in my workshop to do anything.

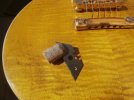
So instead here are a few pictures (@BBN @nathan_393 (close up pics) )of the tool used to create the fake binding.

I must add firmly that I am not a cork sniffer!!!!! LOL I don't even like wine. It almost tastes like vinegar to me.

The tool is a cork with a blade in it. You just set the blade stick out to the width of the desired "binding" and simply scrape. The pics show some areas that at the time had not been completed, but I think the binding is all done now.

P5080097 (1).JPGP5080098 (1).JPGP5080099 (1).JPGP5080095.JPGP5080100.JPG
 
I am busy trying to find photographs of the guitar as things have progressed, but I am struggling to anything that good.
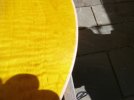
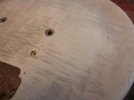
Here is a picture of part of the top when stripped back to bare wood.

P1010021 (2).jpg
 
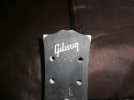
One thing I dislike (hate...) about the Studio models is the cheap gold Gibson logo on the headstock.

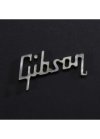
I have added a MOP inlay Gibson logo to match any real "proper" Gibsons. I have used an early 70's style logo which I will photograph when I get the chance.

I have done a few inlays which are really easy to do. It just takes a strong nerve to cut into the wood. :)

This is the inlay I used.

gibson-old-logo-01-412x570.jpg
 
I can't find pictures of when I fitted the inlay but the princible is the same as this one that I did on another guitar.

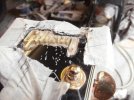
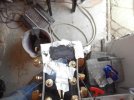
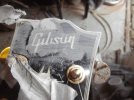
Cut with a chisel, sharp knife or whatever you have to make a recess for the inlay to sit. Making sure that the inlay stands proud of the surface. It looks absolutely terrible, but you need to break eggs to make an omelette. Panic not!P5050015.jpg
 
Once you have you position where you want it simply glue the inlay in.

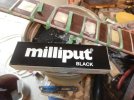
When the glue has dried I use a product called Milliput (an epoxy filler) to fill things. Again it looks horrible but trust me.

P5050028.jpgP5050029.jpg
 
Once dry, sand the filler flat. Using a flat sanding block carefully sand until you can see the protruding inlay and continue down until all is flush with the headstock. It looks a bit messy, but it works.

P5060033.jpg
 
Somewhere in the loft, I have a heavily relic'd gold top which I redid the inlay on to create the early 50's look when Gibson fitted the logo a bit further down the headstock. Once clearcoated with a tinted nitro all looks good.

Untinted and then tinted. The tinted when carefully scratched from the inlay can create the look of an old guitar. The tinted looks pretty harsh and bright in the picture but I think that was caused by the camera's flash. It look OK in real life!


PC070076.JPGP1010060.JPG
 
Last edited:
Just before I forget, if I was to do another inlay like the ones above I would use some black indian ink mixed into some clear epoxy to fill the gaps rather than the Milliput. The Milliput is OK, but it dries like a very dark grey, nearly black but not quite dark enough. It does create a bit more work as I always have to add a little black paint to things to correct them. I think ink might work out a little bit easier.
 
You can buy inlays from the auction site for about £20. I was buying from a company in Portugal but I believe they stopped making them. Their inlays were only about £10. lol
 
The weather has turned against me and it is too cold in my workshop to do anything.

So instead here are a few pictures (@BBN @nathan_393 (close up pics) )of the tool used to create the fake binding.

I must add firmly that I am not a cork sniffer!!!!! LOL I don't even like wine. It almost tastes like vinegar to me.

The tool is a cork with a blade in it. You just set the blade stick out to the width of the desired "binding" and simply scrape. The pics show some areas that at the time had not been completed, but I think the binding is all done now.

View attachment 134633View attachment 134634View attachment 134635View attachment 134636View attachment 134637
Man that looks super nice! Honestly, I really like the finish of the body. I'd absolutely buy a guitar with that 'finish'.
If there was a way to do that to the neck (because I love a bound neck), I'd be buying up every Studio I could find and refinishing them.
I am keeping my eyes open for one though....if I find one cheap enough, I'm going to mimic your project.
 
Back
Top Bottom