godprobe
Power User
[edit] (2009.December.27)
 The Short Answer:
[/edit]
[edit]
(2009.April.18.a)
So I've been through the 16dB SilenX (with ghetto-style rubber grommets, chronicled in this first post) and wasn't happy with it. Then I tried the Fractal Design (no association with Fractal Audio here) fans on a lark and they had a more "pleasant" sound and cool rubber screws, but the noise was still an issue.
Now, I'm fresh off of an install of the 12dB SilenX, the IXP-34-12, and it's great! There's still a tiny hint of the rattle that I also noticed on the 16, but the noise of the fan itself is nearly nonexistent. I can definitely recommend this fan as a replacement. I ordered from Directron since that was the cheapest for me after factoring in taxes and shipping. And I also ordered a pack of four of the "Heavy Duty Rubber Grommets" for the fan. Other shops seem to have the same grommets, and sometimes other options as well. Those got placed between the fan and the stand-off attached to the Axe-Fx lid, and the original fan screws were used.
I can still tell there's a fan spinning inside, but the ambient noise of it is no more than that of my nearfield studio monitors.
Next up, I'm going to try the 8dB version with the FD-FAN's rubber screws. However, I will never actually recommend the 8dB since the CFMs that it pushes are so low, it could very well lead to the Axe-Fx's CPU wearing out much more quickly.
(2009.April.18.b)
8dB is definitely even more silent. With ambient daytime room noise (including a computer in my room that's noticeably quieter than the stock Axe-Fx fan), I have to be six inches away from the Axe-Fx to even detect the fan noise. Drawing something with a pencil makes more noise than this fan.
[/edit]
So I finally replaced the fan in one of my Axe-Fxes today.
Ordered it a couple months ago and ended up getting the SilenX iXtrema 60mm fan, rated at 16 dBA and 18 cfm (SKU IXP-34-16). It was on one of these threads here and I figured, what the heck.
Thankfully, one of my Axe-Fxes is not racked, so it got to volunteer for the procedure.
DISCLAIMER!
I am not responsible for anything you do, nor am I responsible for the outcome of the things you do. This includes the things your friends and enemies do too.
This may void your warranty (though not necessarily). It is not recommended to provide photographic or even anecdotal evidence that you may have voided your warranty. Fractal is pretty awesome, and pretty understanding, and in all cases I'm aware of has not begrudged anyone warranty service when a person has properly replaced their fan. However, I don't speak for Fractal Audio, and, frankly, I don't trust you to properly replace your fan!
Also, this adventure is not intended for those of you who have ordered from G66 in Europe, since they undertake fan replacement themselves. And you guys get chocolate! Sheesh!
With that out of the way...
Here... we... go...

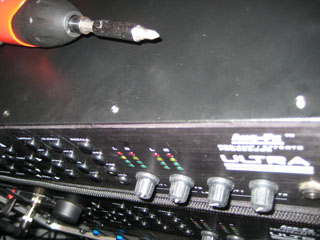
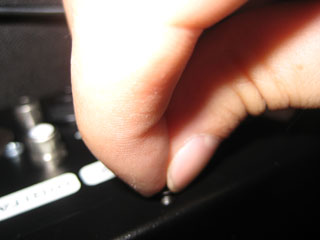
Using the powered screwdriver, loosen all ten screws.
There are five on the top, three in the back, and one on each side.
Once loosened, I prefer to unscrew them the rest of the way by hand to reduce the risk of stripping the threads.
And because I have OCD, I line them up in the order they were in originally so I can replace them exactly where they were.
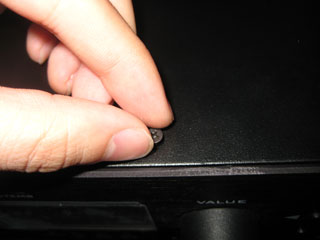
Don't forget the ones on the side...
And now, with all ten screws removed from the top panel, we're ready to slide the cover off.
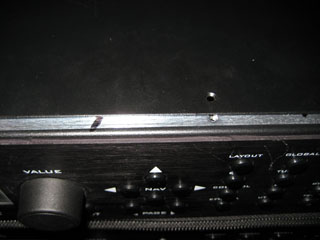
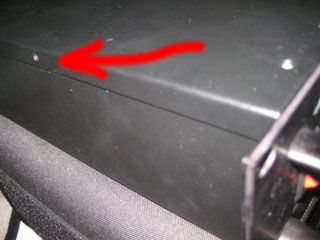
And here's where the magic happens.
BE CAREFUL NOT TO PULL THE COVER RIGHT OFF!!!
The fan is still attached to the board.
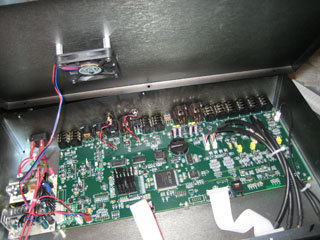
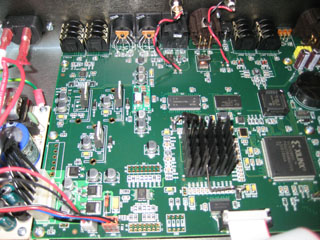
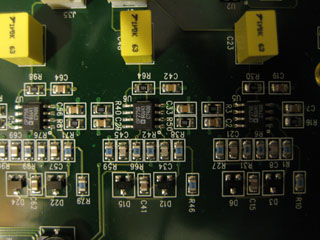
There's lots of fun things inside, but this little bit stood out.
Also, I do not recommend taking pictures, because it's hard to do that and hold the cover at the same time, and there's a good chance of the cover slamming down onto the PC board if you're not careful.
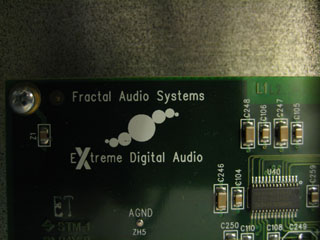
Still... it is a thing of beauty...


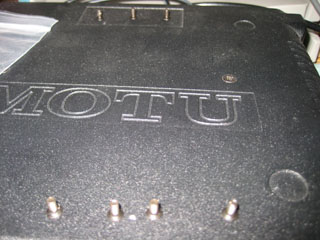
So here are the two bits I used, as well as the fan, still attached to the cover. I used the larger bit for the screws on the fan, and the smaller bit for the case screws.
Again, the screws only need loosening from the motorized screwdriver and the rest can be done by hand. When it gets about to here, the screw is completely loose... just pull it the rest of the way out so that you don't strip the threads.
Once the four screws are removed, remove the fan. There's a small amount of resistance, so I replaced it and filmed that... nothing to worry about, and nothing holding it back... just pull.
Pulling the fan off, on YouTube
Misadventures Part 1...
I noticed the bit extender I was using could work great to pull off the stand-offs that the fan is mounted on.
So I pulled those off and tried various methods of getting the fan to attach to the remaining bits of screw that the stand-offs were attached to (see the "mis-used tools" section above...). But in the end, I gave up on that, and put the stand-offs back on.
Here, a hand screwdriver with a very thin shaft comes in handy, since otherwise it's very difficult to add the screws to the new fan (the new fan is much thicker/taller than the old one, taller than the old screws).
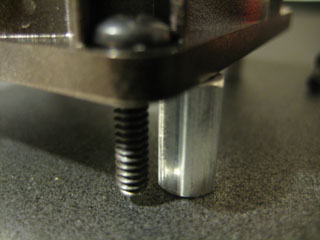
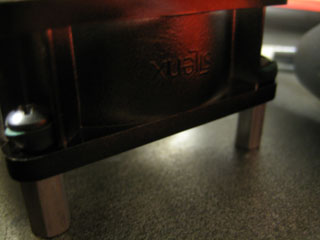
So now, here's where people are talking about using some rubber spacers... this is as far as the original screw will go in, which is not enough to hold down the new fan.
See why? (The stand-off still has a screw going into it from the bottom -- there's no way the original screw can go completely into the stand-off from the top.)
Misadventures Part 2...
So... why not shorten the original screw? Well... because it's a pain in the ass, that's why! And even after you do snap the end off of one of those screws after about ten minutes of effort (probably using completely the wrong tools for it...), the end would still have to be sanded and formed so that it's not wider than the screw-hole. Don't make the same mistake I did... just go with the rubber spacer solution.
(sorry, no pictures chronicling that misadventure... it's hard to take a picture and try to cut a screw with pliers at the same time, especially when the end of the screw finally flies off in some random direction, ricocheting off walls, and never to be found again)
Back to the story... I didn't have any rubber spacers on me. But I *did* have some freshly-cut 1/4" rubber cable insulation stuff.
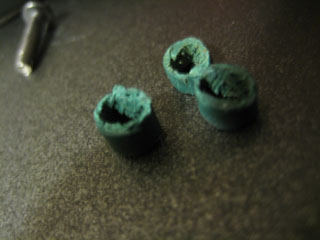
And that seemed to go right around the screw nicely.
And I was able to tighten the screw and not have the fan moving around (even though I only had three screws anymore due to Misadventure #2).
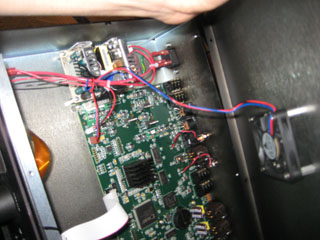
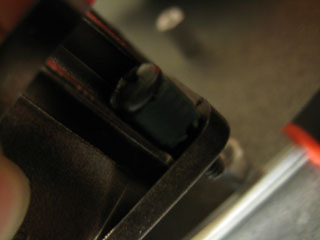
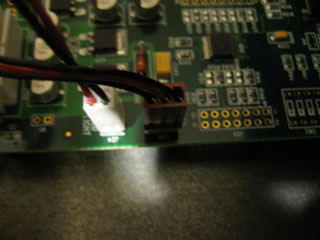
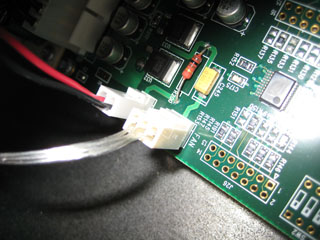
So unplug the original fan from here (just pull)...
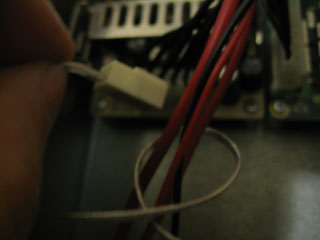
And the original was wrapped in a loop around these wires (probably to keep the cable off the circuit board), so I aped that.
And plugged in...
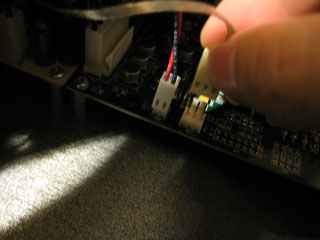
Voilà!
Drop the cover back on...
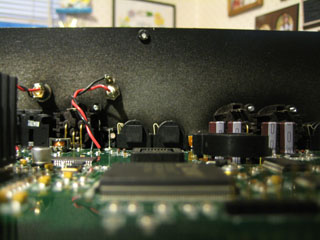
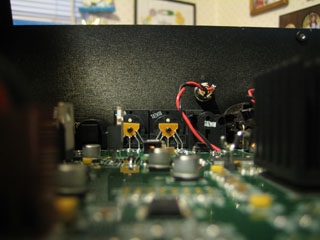
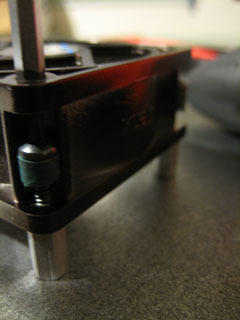
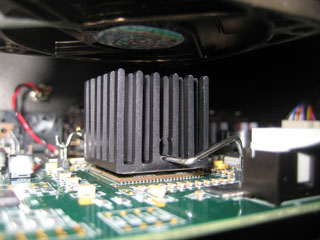
And for those who might be concerned about the new fan touching the heatsink (since the new fan is much thicker than the old one), this photo was taken from inside the case, using a ten-second timer, with the cover completely closed. There's still about a centimeter of space between fan and heatsink.
Again, to avoid stripping the threads, I start replacing all the screws by hand before using the powered screwdriver to tighten them.
And the final results... my first time trying to turn it on, with a small bit of commentary...
End result, on YouTube
The Short Answer:Canadian source (courtesy of vo.van): http://ncix.com/search/?categoryid=2-1164&q=IXP-34GuitarDojo said:[...] SilenX IXP-34-12 60mm [...]
6/32 - 1.25" screws - Home Depot
#60 "O" rings - Home Depot
[/edit]
[edit]
(2009.April.18.a)
So I've been through the 16dB SilenX (with ghetto-style rubber grommets, chronicled in this first post) and wasn't happy with it. Then I tried the Fractal Design (no association with Fractal Audio here) fans on a lark and they had a more "pleasant" sound and cool rubber screws, but the noise was still an issue.
Now, I'm fresh off of an install of the 12dB SilenX, the IXP-34-12, and it's great! There's still a tiny hint of the rattle that I also noticed on the 16, but the noise of the fan itself is nearly nonexistent. I can definitely recommend this fan as a replacement. I ordered from Directron since that was the cheapest for me after factoring in taxes and shipping. And I also ordered a pack of four of the "Heavy Duty Rubber Grommets" for the fan. Other shops seem to have the same grommets, and sometimes other options as well. Those got placed between the fan and the stand-off attached to the Axe-Fx lid, and the original fan screws were used.
I can still tell there's a fan spinning inside, but the ambient noise of it is no more than that of my nearfield studio monitors.
Next up, I'm going to try the 8dB version with the FD-FAN's rubber screws. However, I will never actually recommend the 8dB since the CFMs that it pushes are so low, it could very well lead to the Axe-Fx's CPU wearing out much more quickly.
(2009.April.18.b)
8dB is definitely even more silent. With ambient daytime room noise (including a computer in my room that's noticeably quieter than the stock Axe-Fx fan), I have to be six inches away from the Axe-Fx to even detect the fan noise. Drawing something with a pencil makes more noise than this fan.
[/edit]
So I finally replaced the fan in one of my Axe-Fxes today.
Ordered it a couple months ago and ended up getting the SilenX iXtrema 60mm fan, rated at 16 dBA and 18 cfm (SKU IXP-34-16). It was on one of these threads here and I figured, what the heck.
Thankfully, one of my Axe-Fxes is not racked, so it got to volunteer for the procedure.
Tools used:- Battery-powered screwdriver with two different sized bits[/*:m:114zj54c]
- Small-shafted hand screwdriver[/*:m:114zj54c]
- Some leftover rubber audio cable casing from splicing cables[/*:m:114zj54c]
Tools mis-used (you don't need these... ):- Soldering iron + solder[/*:m:114zj54c]
- Multiple pliers[/*:m:114zj54c]
- Hammer[/*:m:114zj54c]
DISCLAIMER!
I am not responsible for anything you do, nor am I responsible for the outcome of the things you do. This includes the things your friends and enemies do too.
This may void your warranty (though not necessarily). It is not recommended to provide photographic or even anecdotal evidence that you may have voided your warranty. Fractal is pretty awesome, and pretty understanding, and in all cases I'm aware of has not begrudged anyone warranty service when a person has properly replaced their fan. However, I don't speak for Fractal Audio, and, frankly, I don't trust you to properly replace your fan!
Also, this adventure is not intended for those of you who have ordered from G66 in Europe, since they undertake fan replacement themselves. And you guys get chocolate! Sheesh!
With that out of the way...
Here... we... go...
Using the powered screwdriver, loosen all ten screws.
There are five on the top, three in the back, and one on each side.
Once loosened, I prefer to unscrew them the rest of the way by hand to reduce the risk of stripping the threads.
And because I have OCD, I line them up in the order they were in originally so I can replace them exactly where they were.
Don't forget the ones on the side...
And now, with all ten screws removed from the top panel, we're ready to slide the cover off.
And here's where the magic happens.
BE CAREFUL NOT TO PULL THE COVER RIGHT OFF!!!
The fan is still attached to the board.
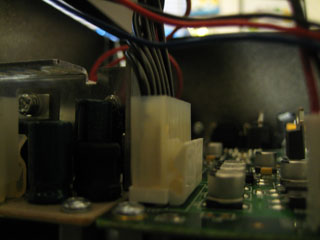
There's lots of fun things inside, but this little bit stood out.
Also, I do not recommend taking pictures, because it's hard to do that and hold the cover at the same time, and there's a good chance of the cover slamming down onto the PC board if you're not careful.
Still... it is a thing of beauty...
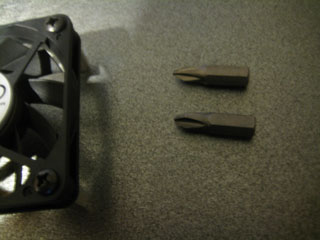
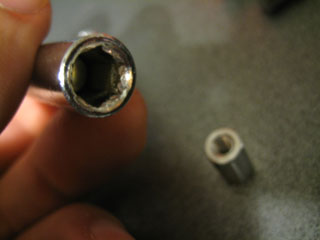
So here are the two bits I used, as well as the fan, still attached to the cover. I used the larger bit for the screws on the fan, and the smaller bit for the case screws.
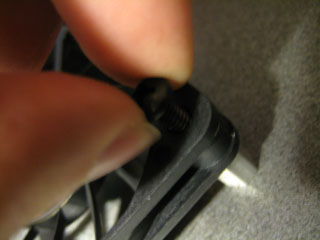
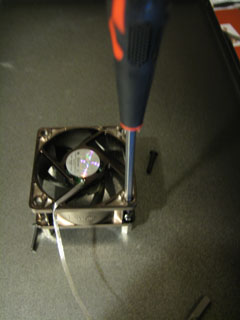
Again, the screws only need loosening from the motorized screwdriver and the rest can be done by hand. When it gets about to here, the screw is completely loose... just pull it the rest of the way out so that you don't strip the threads.
Once the four screws are removed, remove the fan. There's a small amount of resistance, so I replaced it and filmed that... nothing to worry about, and nothing holding it back... just pull.
Pulling the fan off, on YouTube
Misadventures Part 1...
I noticed the bit extender I was using could work great to pull off the stand-offs that the fan is mounted on.
So I pulled those off and tried various methods of getting the fan to attach to the remaining bits of screw that the stand-offs were attached to (see the "mis-used tools" section above...). But in the end, I gave up on that, and put the stand-offs back on.
Here, a hand screwdriver with a very thin shaft comes in handy, since otherwise it's very difficult to add the screws to the new fan (the new fan is much thicker/taller than the old one, taller than the old screws).
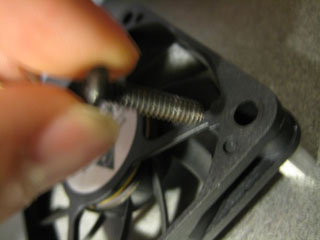
So now, here's where people are talking about using some rubber spacers... this is as far as the original screw will go in, which is not enough to hold down the new fan.
See why? (The stand-off still has a screw going into it from the bottom -- there's no way the original screw can go completely into the stand-off from the top.)
Misadventures Part 2...
So... why not shorten the original screw? Well... because it's a pain in the ass, that's why! And even after you do snap the end off of one of those screws after about ten minutes of effort (probably using completely the wrong tools for it...), the end would still have to be sanded and formed so that it's not wider than the screw-hole. Don't make the same mistake I did... just go with the rubber spacer solution.
(sorry, no pictures chronicling that misadventure... it's hard to take a picture and try to cut a screw with pliers at the same time, especially when the end of the screw finally flies off in some random direction, ricocheting off walls, and never to be found again)
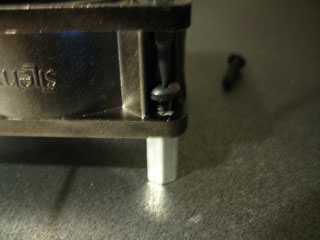
Back to the story... I didn't have any rubber spacers on me. But I *did* have some freshly-cut 1/4" rubber cable insulation stuff.
And that seemed to go right around the screw nicely.
And I was able to tighten the screw and not have the fan moving around (even though I only had three screws anymore due to Misadventure #2).
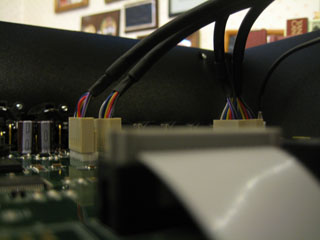
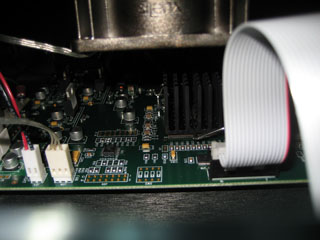
So unplug the original fan from here (just pull)...
And the original was wrapped in a loop around these wires (probably to keep the cable off the circuit board), so I aped that.
And plugged in...
Voilà!
Drop the cover back on...
And for those who might be concerned about the new fan touching the heatsink (since the new fan is much thicker than the old one), this photo was taken from inside the case, using a ten-second timer, with the cover completely closed. There's still about a centimeter of space between fan and heatsink.
Again, to avoid stripping the threads, I start replacing all the screws by hand before using the powered screwdriver to tighten them.
And the final results... my first time trying to turn it on, with a small bit of commentary...
End result, on YouTube