Share your DIY controller project based on MIDI for 3rd Party Devices | AXE3 | FM3 | FM9 |

  • Analog noise high sensivity (you have to be careful with analog inputs as they can get very noisy -> can be annoying for pedals)
Yes this is true, the analog is very noisy

My pedals are on the analog pins and give a start / end value of all the time. Had to work around that by making the value start at 2 or 125 instead of 1 or 126.

If you have any suggestions how to overcome the start/ end noise im all ears

Thanx in advance

Cheers 🍻
that sounds normal, i always use averaging on the pedal inputs, if you shunt the input to ground and remove the pedal do you still read fluctuating value? it could the pedal pots sometimes too...
Another day, gonna implement eeprom pedal calibration, i started to write eeprom code on my branch to switch the floorboard to standard midi program changes when I need to use other devices, so I'll continue on this later (not a lot of spare time to be honest).
I work on these projects in rafal mode : meaning i spend few hours or half a day top (before my gf starts to yell) and implement a bunch of code then can be idle for months LOL
 
Last edited:
if you want to experiment there is these kind of circuits (super compact!):
https://www.adafruit.com/product/1083
cheaper boards here
with 4x 12 bit ADC's and this could be a neat way to isolate analog circuitry as all that would go to the Tenssy board are digital and power pins...
There are other techniques, like using a voltage reference chip instead of power supply 3.3v, build a low speed rc filter (a bit more involved) to filter out too fast frequencies that are obviously much higher than 100Hz
 
Last edited:
The screens are from this seller:
https://a.aliexpress.com/_EvsZfu3

Is you buy more then 10 you can app the seller for discount (above some price there is even free shipping) great store good producs fast shipping and great service if anything is wrong.
I had 3 'broken' screens from a stash of 34 I bought , he replaced them for me for free.

I still have 1 defective screen on my peddleboard, but to lazy to replace it ;)

View attachment 128218View attachment 128219

These screens are really great. I can overclock them on 3.3V up to 38Mhz
On 5V I clock them 32Mhz and normal is 27Mhz for ST7735.
With the bodmer library, you can do all kinds of fast printing on the screens. Even the sprite function is just stellar 👌. My tuner is a Sprite and updates ridiculously fast. The tuner sprite code is borrowed from @prongs_386 his peddleboard.

Cheers 🍻
So i got a pair of the 1.8" and a pair of the 1.44" from this seller, they work great with BMC already, i ran 2 of these only tho but it worked out pretty good, for these displays i'm using the ST7735_t3 which is optimized for teensy but since the Chip Select pins are not the hardware pins it doesn't use the optimized much faster code, still they render really well and really fast, on the attached i have the two 1.8" displays and BMC is synced to logic so those are the first 2 channels, they meters update in real time really fast!, i'll be pushing this out to BMC next week once i've tested them a bit more
 

Attachments

  • IMG_4680.jpg
    IMG_4680.jpg
    2.6 MB · Views: 19
TEENSY 4.1 BUILD with all used components

View attachment 128046View attachment 128084
1x Teensy 4.1​
1x Hammond enclosure: (1456RL1BKBK)​
15x TFT screens: ST7735 1.8 inch blue SPI from ROARKIT store (alixp, app the seller and make a good price)​
18x FootSwitch: (softswitch NON Momentary)​
1x 16*2 lcd screen (blue background) used with a i2C 4 pin connector​
1x BUCK 45V-9V to 5V​
1x BUCK 5V to 3.3V​
1x 16 channel multiplexer​
16x 10K resistors​
1x momentary powerswitch (I used one with a LED color ring)​
4x Stereo 6.3 Jack connectors ( used 2 for exp pedals and 2 for wiring guitar signal to fractal)​
4x 220K resistor (2 for the exp pedals) (2 for TX and RX)
1x cell battery case (with solder connection)​
1x USB-B to microUSB extention cable (connect to the Teensy usb port).​
1x micro USB extender cable (to get easy acces to the micro USB. I places the input in a ventilation sloth on the back.)​
1x RJ45 female connector with open terminals for cable connection.​
5Mtr 22AWG cable to connect footswitches to multiplexer etcetera​
2.5mtrs 16 row grey flat ribbon cable​
18x 16pin 2.54mm ribbon IDC socket connector​


NOTE:
My build is working powered by the Faslink (12V) to the peddleboard, over a CAT6 UTP cable. But the power is not as stable as I wanted to be, so still i'm searching for a better solution (maby 2 connection cables). Now im temporarely using a 5V external powersource over CAT6 that works.​
EDIT: Power from Faslink works now.​
I needed to transfer the power over 2 connecting cables instead of 1. I just bridged 2 connectors on each side and it works flawlessly 🤘.​
I wanted this build to be a 1 cable solution and with the CAT6 I managed to do that. There may be other solutions, but this works for me.​
Offcorse there is still the guitar cable, but I did not have a solution for that (other than wireless), so I connect my guitar to the peddleboard and signal from the peddleboard to the Fractal. (see the backside of the enclosure on the left near the powerbutton. That is guitar-in guitar-out.)​
View attachment 122650


* Power management:
The Teensy 4.1 doesn't have 5V, so I had to be creative to power up the components.​
Also, the Teensy 4.1 does not have enough juice to power al the screens, so had to be creative to external power all the screens. (see the power schema for reference)​
!! Important
Also, to external Power the Teensy, I had to cut the connection with the usb port. Now I can use external power and still connect the USB at the same time. Only USB will not power the Teensy anymore.​
View attachment 122647

* Screens daisy chain:
Create 3 daisy chain rows for the screens. Make sure you will not exceed the cable length of 30cm per row.​
The connectors have a perfect fit on the screen pins, so you can create a very stable chained connection between the screens.​
The shorter the cable length, the faster you can run the St7735 SPI screens. I am on 38Mhz and my cable is max. 27cm. The max. for ST7735 is​
27Mhz, so overclocking is possible with the Bodmer eSPI libriary (that is what I am using).​
View attachment 122648View attachment 122649


* 16 channel multiplexer.
The multiplexer is for ALL the switches. But my build has 18 switches, so 2 are connected to a pin on the Teensy.​
Follow this schema to connect the pins to the multiplexer and use 10K resistors for every pin.​
Connected the 4 pins to anolog pins (!! NON PWR management)​
View attachment 122654View attachment 122655 View attachment 122656


* Connect Screens, Switches and components
Follow the pin schematics to connect. This is my schema as my layout for the build.​
The digital clock has a cell battery, connect it to the VBAT and GROUND and it will work instantly.​
View attachment 122646


* Software:
Arduino IDE V2.1.1 (works best for me)
Teensyduino V1.57 (Other versions conflict with the MUX and TFT libriary)

You will need these libriarys for the components and software to function correctly
  1. AxeFxControl from TysonIt
  2. Bodmer TFT_eSPI-master
  3. MUX74HC4067-master
  4. SD
  5. hd44780


What can you change yourself in the layout configuration of the peddleboard:
[coming]
Brother, I'm trying to build the teensy firmware for this in Arduino IDE v 2.2.1 but getting errors with some missing header files. In particular the <Preset_amp_ini.h> is missing - is that meant to be in the AxeFXControl library? Do I have the wrong version?

Also some of the other headers in your project I had to move them into the same folder as the INO sketch file for the IDE to find them. Did you have any other preferences set up in Arduino IDE which change the header search paths?

Many thanks! Though I wanted to design my own variant of this with a big rich GUI on a touch screen I've decided I'll never probably have time for that so I should just build your version (thank you for all your time spent and for sharing - we all owe you a beer).
 
TEENSY 4.1 BUILD with all used components

View attachment 128046View attachment 128084
1x Teensy 4.1​
1x Hammond enclosure: (1456RL1BKBK)​
15x TFT screens: ST7735 1.8 inch blue SPI from ROARKIT store (alixp, app the seller and make a good price)​
18x FootSwitch: (softswitch NON Momentary)​
1x 16*2 lcd screen (blue background) used with a i2C 4 pin connector​
1x BUCK 45V-9V to 5V​
1x BUCK 5V to 3.3V​
1x 16 channel multiplexer​
16x 10K resistors​
1x momentary powerswitch (I used one with a LED color ring)​
4x Stereo 6.3 Jack connectors ( used 2 for exp pedals and 2 for wiring guitar signal to fractal)​
4x 220K resistor (2 for the exp pedals) (2 for TX and RX)
1x cell battery case (with solder connection)​
1x USB-B to microUSB extention cable (connect to the Teensy usb port).​
1x micro USB extender cable (to get easy acces to the micro USB. I places the input in a ventilation sloth on the back.)​
1x RJ45 female connector with open terminals for cable connection.​
5Mtr 22AWG cable to connect footswitches to multiplexer etcetera​
2.5mtrs 16 row grey flat ribbon cable​
18x 16pin 2.54mm ribbon IDC socket connector​


NOTE:
My build is working powered by the Faslink (12V) to the peddleboard, over a CAT6 UTP cable. But the power is not as stable as I wanted to be, so still i'm searching for a better solution (maby 2 connection cables). Now im temporarely using a 5V external powersource over CAT6 that works.​
EDIT: Power from Faslink works now.​
I needed to transfer the power over 2 connecting cables instead of 1. I just bridged 2 connectors on each side and it works flawlessly 🤘.​
I wanted this build to be a 1 cable solution and with the CAT6 I managed to do that. There may be other solutions, but this works for me.​
Offcorse there is still the guitar cable, but I did not have a solution for that (other than wireless), so I connect my guitar to the peddleboard and signal from the peddleboard to the Fractal. (see the backside of the enclosure on the left near the powerbutton. That is guitar-in guitar-out.)​
View attachment 122650


* Power management:
The Teensy 4.1 doesn't have 5V, so I had to be creative to power up the components.​
Also, the Teensy 4.1 does not have enough juice to power al the screens, so had to be creative to external power all the screens. (see the power schema for reference)​
!! Important
Also, to external Power the Teensy, I had to cut the connection with the usb port. Now I can use external power and still connect the USB at the same time. Only USB will not power the Teensy anymore.​
View attachment 122647

* Screens daisy chain:
Create 3 daisy chain rows for the screens. Make sure you will not exceed the cable length of 30cm per row.​
The connectors have a perfect fit on the screen pins, so you can create a very stable chained connection between the screens.​
The shorter the cable length, the faster you can run the St7735 SPI screens. I am on 38Mhz and my cable is max. 27cm. The max. for ST7735 is​
27Mhz, so overclocking is possible with the Bodmer eSPI libriary (that is what I am using).​
View attachment 122648View attachment 122649


* 16 channel multiplexer.
The multiplexer is for ALL the switches. But my build has 18 switches, so 2 are connected to a pin on the Teensy.​
Follow this schema to connect the pins to the multiplexer and use 10K resistors for every pin.​
Connected the 4 pins to anolog pins (!! NON PWR management)​
View attachment 122654View attachment 122655 View attachment 122656


* Connect Screens, Switches and components
Follow the pin schematics to connect. This is my schema as my layout for the build.​
The digital clock has a cell battery, connect it to the VBAT and GROUND and it will work instantly.​
View attachment 122646


* Software:
Arduino IDE V2.1.1 (works best for me)
Teensyduino V1.57 (Other versions conflict with the MUX and TFT libriary)

You will need these libriarys for the components and software to function correctly
  1. AxeFxControl from TysonIt
  2. Bodmer TFT_eSPI-master
  3. MUX74HC4067-master
  4. SD
  5. hd44780


What can you change yourself in the layout configuration of the peddleboard:
[coming]
I resolved that problem - the earlier github repo you shared contained the missing header for preset_amp_ini.h in the PARI_INI library. Now I have a problem that the real-time clock library (DS3231) you used is not the same as the one I have installed - there's a member function call missing from the library.

Can you share which real-time clock library you are using? Thanks!
Hey there

I didnt public share the teensy build, so I guess you are using the Arduino due build from github?

There is no need for the DS3231 for the teensy (4.*) as it has a build in real time clock.

Let me know if you interest for the teensy build, I will DM you a Share link.

Cheers 🍻
 
Hey there

I didnt public share the teensy build, so I guess you are using the Arduino due build from github?

There is no need for the DS3231 for the teensy (4.*) as it has a build in real time clock.

Let me know if you interest for the teensy build, I will DM you a Share link.

Cheers 🍻
Hmmm actually building around Teensy 4.1. It seems that some library code is what's causing the call to DS3231. It's not clear what teensy library should be called and if other code mods would be needed as a result of the different RTC...

Hints?

Meanwhile I'm designing a carrier board for the teensy, MIDI opto-isolator, power supply etc.

Thankyou!
 
Building a controller is an awesome project, but creating a new workshop is just as much fun 😁
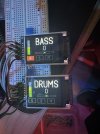
. Just finished this setup today and I'm happy I switched from 49 inch ultra wide to this setup.

Here is an .rdp session to my workstation from my laptop, showing the workstation on the 2 screens as 1 big screen.

20231128_232505.jpg

Cheers 🍻
 
Last edited:
Back
Top Bottom