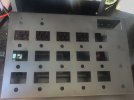
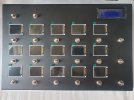
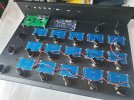
Multi-Screen DIY controller

Setting the AMP or CAB channels directly from the pedalboard can be a cool option, e.g: for fast comparison while you are tweaking.

I don't know why the information to grab the AMP/CAB names is not shared at the Axe-FX III, as it was at the II. We could open a request at the Wish List
Setting the channel option is allready working. I use it very offten and like it. It is available in the effectpage.

Maby making it available in the scenepage is more obvious.. then the looperpage has to make room for it.

Adding it to the wishlist is a good option. Will do that asap. Still have some hope a contributer will come along and share his/her knowledge 😀

About the channel switching. You think amp1/cab1 abcd switching shouls also be combined with 1 button push? Ive seen many reguest, but since it can be done, would it be of any use?

Cheers


Cheers
 
I guess you could use trial and error to try and figure out more sysex features available, but they just might not be there at all as opposed to being undocumented.

Without modification you can use AxeControl library to do this - use
registerSysexPluginCallback to register a function to print out any data coming back.

Then just call the sendCommand method. They've documented up to command 0x14. Based on looking at the other documented commands you might need to guess what arguments to pass. For example if they were to implement a load amp name, what would it look like?

Lets say it would be generalised and the command is getBlockSubType (0x15), you would need to pass in the block number as an argument. So 0x00 through to 0x53 (84 blocks total). There would likely not be any other argument, but it's not necessarily the command 0x15. I would be trying to print out the bytes returned from AxeFx. If you got a response after firing a 0x15 command, then you know there are undocumented commands there so could be worth persuing. No response could mean wrong number of arguments so playing with that.

Basically it's a needle in a haystack though and would take a long time to figure out and why would they build such functions and not document? Unlikely that this exists ultimately and probably only available on the proprietery protocol used through FasLink or USB to AxeEdit.
Hey there @prongs_386

thank you for pointing this out. I am reading about the midi sysex and how it is used.
Learning bunch of new stuff :) but now i have try to understand it haha...

Cheers
 
Hey there @prongs_386

OMG what have i got myself into.... sysex is somehow interesting, though annoying when not understood. I am on the level of not understanding, but i will get there ( i hope) ;)

I have implemented the Axe.registerSysexPluginCallback(SysexPluginCallback); but it is a bool and it is always on false, which means it overrides all the standard sysex and it will not communicate with the AxeFxIII . Any suggestions? It is great for testing i guess, but at the moment i am stuck on this quest.

I have found out that F0 00 01 74 10 are the default for the start of the sysex, but how to fire it to the axe with the SysexPluginCallback is still unclear.
I made a HEX into binary and into decimal page in MSExcel because i didn't understand the difference in the language.
0x15 is a HEX, but it took me a long while to figure out the 0x is not used and only the 15 counts. 1 = 16 and 5 = 5 together it is 21 and in binary that will be 00010101. Great! but now what hahaha, i have a brainshake at the moment.

If you have some spare time... i could use some assistance on this one. Thanx in advance


Cheers
 
Last edited:
The first versions of my controller, before Tysonlt created the great AxeFX library, was using sysex to retrieve the preset and scene number and name. As usual, I started by copying from another program

Sketch attached
 

Attachments

  • Axe3Controller_V8.2.zip
    5 KB · Views: 20
The first versions of my controller, before Tysonlt created the great AxeFX library, was using sysex to retrieve the preset and scene number and name. As usual, I started by copying from another program

Sketch attached
Hey there @Piing
Thank you for sharing. This will help me to understand more and create a test enviroment for the sysextest in the program.

Getting back on track is a great moment :)

Cheers
 
Hey there,

Just a quick notice.
I changed the baudrate from 9600 to 1000000 and been up and running for 1 hour without any problems at all.

--> The arduino is blazing fast. Screens updating is really fluit.

While working on the sysex for amp and cab (cab is documented in the wiki so i started there) i came across the baut rate.
Didnt have any idea this would have any effect on the working of the arduino but it does.


This sysex quest i am on has some cool side effects now

I have edited the Arduino Due buffer size in {User folder}\AppData\Local\Arduino15\packages\arduino\hardware\sam\1.6.12\cores\arduino\RingBuffer.h to 512


cheers
 
Last edited:
That's interesting. I think I just run on 32,500 which is the midi standard. The docs for due say if you run above 115,200 you could get data loss. I might give it a try as well to see if it speeds up the preset name loading.
 
That's interesting. I think I just run on 32,500 which is the midi standard. The docs for due say if you run above 115,200 you could get data loss. I might give it a try as well to see if it speeds up the preset name loading.
Hey there @prongs_386

It works, and its soooo fast. But, whatever you do, dont use it with the arduino IDE serial monitor lol, that doesnt work so good.
Share your experience if it is working faster for you too.

#update on the sysex
I have @Piing his version 8.2 running on my peddleboard and try to get knowledge what the program is doing. I have a clue, but at the moment my changes are not working. Still on it though, i am destined to make AMP and CAB names showing on the screens working.

I will get it... but for now its still trial and error, reading and adapting and try again.
(with the baudrate on 9600 ;)
Cheers
 
Looking good @Piing. Time consuming but fun!

@Axelman8 I updated my solution to use 1,000,000 baud rate for Serial (used for logging) and Serial2 (used for midi in my case). Changing Serial didn't have any perceivable difference for me - I timed startup time / general functionality and couldn't see a difference. Changing midi baud rate resulted in the midi just not working at all. I wonder why it made a difference for you, possibly you have a bunch of logging which was slowing things down?
 
Hey there @Piing

All these buttons... so much functionality and info at your feet, its cool you wont regret it. It is looking freaking good. Good luck on the soldering, the fun side of the build 😀

Cheers
 
Last edited:
@Axelman8 I updated my solution to use 1,000,000 baud rate for Serial (used for logging) and Serial2 (used for midi in my case). Changing Serial didn't have any perceivable difference for me - I timed startup time / general functionality and couldn't see a difference. Changing midi baud rate resulted in the midi just not working at all. I wonder why it made a difference for you, possibly you have a bunch of logging which was slowing things down?
hey there @prongs_386

I have no clue why it makes a diffrence on my end. The screen refresh is showing the info quicker than on 9600 Baud.

I have adjusted the serial on the .ino tab in my build. I dont know if that effects the serial1, as that is placed on the variable.h tab. I guess it has no effect.

I will make a short video to show the diffrence with the baudrate. If it has positive effect on my build i have to digg in what the logging is... really no clue yet learning more and more

Cheers
 
Hey there

the sysex AMP/CAB name quest is interesting, but somewhat frustrating.
Seems with the AxeIII some of the sysex code is hidden and only given to 3rd party vendor(s) or they payd for it.

Anyway, here is my experience on this quest:
In the wiki is a functionality to extract the CAB name: (for the axe-fx 2)

GET_CAB_NAME
Message format:
HEADER BYTES 0x12 Function ID (0x12), 0xdd Cab Number, 0xdd Checksum, 0xF7 SysEx End

Response format:
HEADER BYTES 0x12 Function ID (0x12), 0xdd null-terminated string byte0, 0xdd byte1, ..., 0x00 null character, 0xdd Checksum, 0xF7 SysEx End

What interesting with this message, is that the 0x12 is bypassed in the third party devices midi document.
So i have had a great time chasing the dream of extracting the Cab name, but unfortunately i did not succeed

The sysex message i send whas:

0xF0, 0x00, 0x01, 0x74, 0x10 (standard header)
0x12 (function ID)
0x3E (Cab1 ID = 62 (62 decimal = 3E HEX)
0xB1 ( Sum of: f0 ^ 00 ^ 01 ^ 74 ^ 10 ^12 = B9) Sum of ( B9 ^ F7 = B1)

Send message: 0xF0, 0x00, 0x01, 0x74, 0x10, 0x12, 0x3E, 0xB1, 0xF7
Receive message: F0 00 01 74 10 64 12 01 62 F7 F0 00 01 74 10 64 12 00 63 F7 (20 characters)
This is the result i get each time when playing around with function ID hex etc. 0x15, 0x16,0x17... with the correct checksum for each new message, but no luck on any positive message from the AxeFxIII

BlockID information:
AMP1 = 58, AMP2 = 59, AMP3 = 60, AMP4 = 61. CAB1 = 62, CAB2 = 63, CAB3 = 64, CAB5 = 65

I have also done a lot of testing with several Send commands that are allready existing like from V8.2 of @Piing : (they all work)

* Preset name:
Send message = 0xF0, 0x00, 0x01, 0x74, 0x10, 0x0D, 0x7F, 0x7F, 0x18, 0xF7 (0x18 = Checksum)
Receive message = F0 00 01 74 10 0D 01 00 50 65 74 72 75 63 63 69 20 52 69 67 20 32 30 32 30 20 20 20 20 20 20 20 20 20 20 20 20 20 20 00 6A F7. The actual ASCII conversion is: ð�t�Petrucci Rig 2020 �j÷

The letter P in HEX = 50, so the name is extracted after the 0x00 . The name is always 32 characters, so the 20 20 20 20 are spaces to fill the name up to 32 characters. What the function of the 00 is i have no clue. The ASCII for 00 = NULLNULL

Because i have not succeeded in my attempt to extract the CAB name i gave up and have made a request in the WISH thread:
https://forum.fractalaudio.com/threads/amp-cab-name-sysex-request-axefxiii.173024/

Hope to get a positive response on that request


If anyone has an idea on how to test it a little more .... i would be very interested.


Cheers
 
Hey there @prongs_386

I have a short video of the baudrate diffrence in my program.
First is 9600 baud, second is 1000000 baud.

On the 1000000 baudrate video i dont push the button hard enough, that doesnt happen with my feet at all

Again no cool intro on the video ;)


Cheers
 
The letter P in HEX = 50, so the name is extracted after the 0x00 . The name is always 32 characters, so the 20 20 20 20 are spaces to fill the name up to 32 characters. What the function of the 00 is i have no clue. The ASCII for 00 = NULLNULL
ASCII 00 is NUL.

A NUL byte is often used as a delimiter.

It's non-printable.

I suggest just stripping it from the beginning and end.

You can probably also strip all trailing spaces unless you need them for formatting your display.
 
Today I replaced my 7 pin DIN between controller and midi box with ethernet. I wasn't very happy with my reliability of the 7 pin cable because it was too thick to properly fit the DIN connectors. In hindsight I should have just used ethernet cable anyway but now I have a better connector and can just use standard cable I can buy anywhere rather than making it myself.

I think originally I was turned off by not finding any ethernet ports that I could mount with bolts but I'm just going to super glue them in and will hopefully be strong enough.
 
That is great !
Today I replaced my 7 pin DIN between controller and midi box with ethernet. I wasn't very happy with my reliability of the 7 pin cable because it was too thick to properly fit the DIN connectors. In hindsight I should have just used ethernet cable anyway but now I have a better connector and can just use standard cable I can buy anywhere rather than making it myself.

I think originally I was turned off by not finding any ethernet ports that I could mount with bolts but I'm just going to super glue them in and will hopefully be strong enough.
Hey there @prongs_386
That is great work. I guess rj45 is the best option for the midi connection.

Howlong is your cable from the axe to the pedalboard?

and:

Are you powering the pedalboard through the ethernet? I use standard usb cord power, but want to use this power over ethernet also. I will skip the powering from the axe unit, as i dont want to fry it .. as i allmost did 🤯

My theory on powering:
The midi in and out is 6 lines, ethernet has 8 lines, so the not used two lines could be used for the usb power, but this is only based on theory. Haven't gotten to solder new midi in/out connectors to connect on the rj45 boxes i have.

Any details on your solution?

Cheers m8
 
The cable I've tested with so far is 5m.

Regarding power I use a DC transformer to the midi box then send that through the ethernet. I imagine this will be exactly the same with your usb setup. Just a VCC and ground from usb instead.

I only use 7 pins because the midi input/output can share a ground pin but could separate and use the 8th wire as well. Working great so far!
 
Hey there @prongs_386

Yesterday i finished my MIDI to RJ45 <--> RJ45 to MIDI solution. Thank you for inspiring me to get on with the RJ45 solution because it is working perfectly with a 10 meter CAT5 cable. I even added the USB power over the CAT5 and the house didn't burn down (yet).

I dont know if the expression pedal signal will work smoothly over the RJ45, but the Tuner data is working the same as on the MIDI cables, so there is no loss in data transfer.


To who are following this thread:
I wrote a topic about how I made the solution: https://forum.fractalaudio.com/threads/diy-midi-to-rj45-rj45-to-midi-without-soldering.173757/


Cheers
 
Back
Top Bottom