Piing
Axe-Master
Few months ago I had no idea of what Arduino was, but today I have a working MIDI pedalboard to control the Axe-FX. I am writing this thread to encourage everyone to build their own pedalboard. If a dummy like me can, you can too!! At least you can try it, just for fun. It’s cheap and harmless.
I have borrowed code from several sources and learnt to understand it and modify it by trial and error. I have also found the other threads at this forum to be very helpful.
The main source of information about Arduino (install software, connections, upload code, etc.) is here: https://www.arduino.cc
You can even ignore the science! Just buy and assembly the components, upload the code as it is, and voila! It’s very simple. If you cannot solder wires, find a friend who can do it for you.
At an initial stage you don’t even need the foot-switches or to assembly things on a box to ensure that it is working; only the Arduino board, the Midi Output, and a piece of wire to simulate the contact switches. Like this picture:
Questions are welcome. I’m no expert, but we can work together.
Shopping list:
- Arduino Mega ( $6.56 )
http://www.ebay.com/itm/401036224315?_trksid=p2060353.m2749.l2649
- DIN Female Jack (7 pin if you want power supply from Midi Cable) ($0.99)
http://www.ebay.com/itm/272139554632?_trksid=p2060353.m2749.l2649
- LCD display (I’ve bought one with a keypad that I may use in the future) ($2.56)
http://www.ebay.com/itm/Keypad-Shie...emilanove-UNO-MEGA2560-MEGA1280-/221849044117
- Stomp Pedal Momentary Switches ( $2.54 each)
http://www.ebay.com/itm/Guitar-Peda...Effects-Push-Button-Foot-Switch-/400914113943
- 220 Ohm resistors for the MIDI Output and for the LED’s ($1 for 100 units)
- LED’s ($1 for 50 units)
Minimum cost:
Arduino Mega.................................... 1 x $6.56 = $ 6.56
LCD Display...................................... 1 x $2.56 = $ 2.56
MIDI DIN Female Jack...................... 1 x $0.99 = $ 0.99
Stomp Pedal Momentary Switches... 15 x $2.54 = $ 38.10
220 Ohm resistors............................. 17 x $0.02 = $ 0.34
0.5 mm LED...................................... 15 x $0.05 = $0.75
Case................................ Free, using imagination
Cable................................ Cannibalized from scrap LAN wire
TOTAL COST .......................................................$ 49.30
Current Features:
Possibilities:
- Implement MIDI Input to read real-time data from Axe-FX. (preset name, scene, tuner, etc)
I have not implemented the MIDI input yet because I always have the Ax-FX close to me, so I can directly read its screen. I'll do it for fun when I have more time.
Connections:
Midi Output:
- MIDI DIN socket pin 5 connected to Arduino pin 1 (TX) through a 220 ohm resistor
- MIDI DIN socket pin 4 connected to Arduino +5 pin through a 220 ohm resistor
- MIDI DIN socket pin 2 connected to ground
Instructions: https://www.arduino.cc/en/Tutorial/Midi
Switches:
Common terminal of all switches connected to ground
The 15 Switches are connected to pins n. 22, 24, 26, 28, 30, 32, 34, 36, 38, 40, 42, 44, 46, 48, 50
http://www.instructables.com/id/Arduino-Button-with-no-resistor/
LEDs:
Enclosure:
The enclosure for my prototype is free. I’ve just grabbed a recycled binder from the office. It is strong enough for home use. If you need a beer-proof enclosure you could use a large cookie metal box or whatever you can find...")
Edit: 8-April-2018. New pictures


I have borrowed code from several sources and learnt to understand it and modify it by trial and error. I have also found the other threads at this forum to be very helpful.
The main source of information about Arduino (install software, connections, upload code, etc.) is here: https://www.arduino.cc
You can even ignore the science! Just buy and assembly the components, upload the code as it is, and voila! It’s very simple. If you cannot solder wires, find a friend who can do it for you.
At an initial stage you don’t even need the foot-switches or to assembly things on a box to ensure that it is working; only the Arduino board, the Midi Output, and a piece of wire to simulate the contact switches. Like this picture:
Questions are welcome. I’m no expert, but we can work together.
Shopping list:
- Arduino Mega ( $6.56 )
http://www.ebay.com/itm/401036224315?_trksid=p2060353.m2749.l2649
- DIN Female Jack (7 pin if you want power supply from Midi Cable) ($0.99)
http://www.ebay.com/itm/272139554632?_trksid=p2060353.m2749.l2649
- LCD display (I’ve bought one with a keypad that I may use in the future) ($2.56)
http://www.ebay.com/itm/Keypad-Shie...emilanove-UNO-MEGA2560-MEGA1280-/221849044117
- Stomp Pedal Momentary Switches ( $2.54 each)
http://www.ebay.com/itm/Guitar-Peda...Effects-Push-Button-Foot-Switch-/400914113943
- 220 Ohm resistors for the MIDI Output and for the LED’s ($1 for 100 units)
- LED’s ($1 for 50 units)
Minimum cost:
Arduino Mega.................................... 1 x $6.56 = $ 6.56
LCD Display...................................... 1 x $2.56 = $ 2.56
MIDI DIN Female Jack...................... 1 x $0.99 = $ 0.99
Stomp Pedal Momentary Switches... 15 x $2.54 = $ 38.10
220 Ohm resistors............................. 17 x $0.02 = $ 0.34
0.5 mm LED...................................... 15 x $0.05 = $0.75
Case................................ Free, using imagination
Cable................................ Cannibalized from scrap LAN wire
TOTAL COST .......................................................$ 49.30
Current Features:
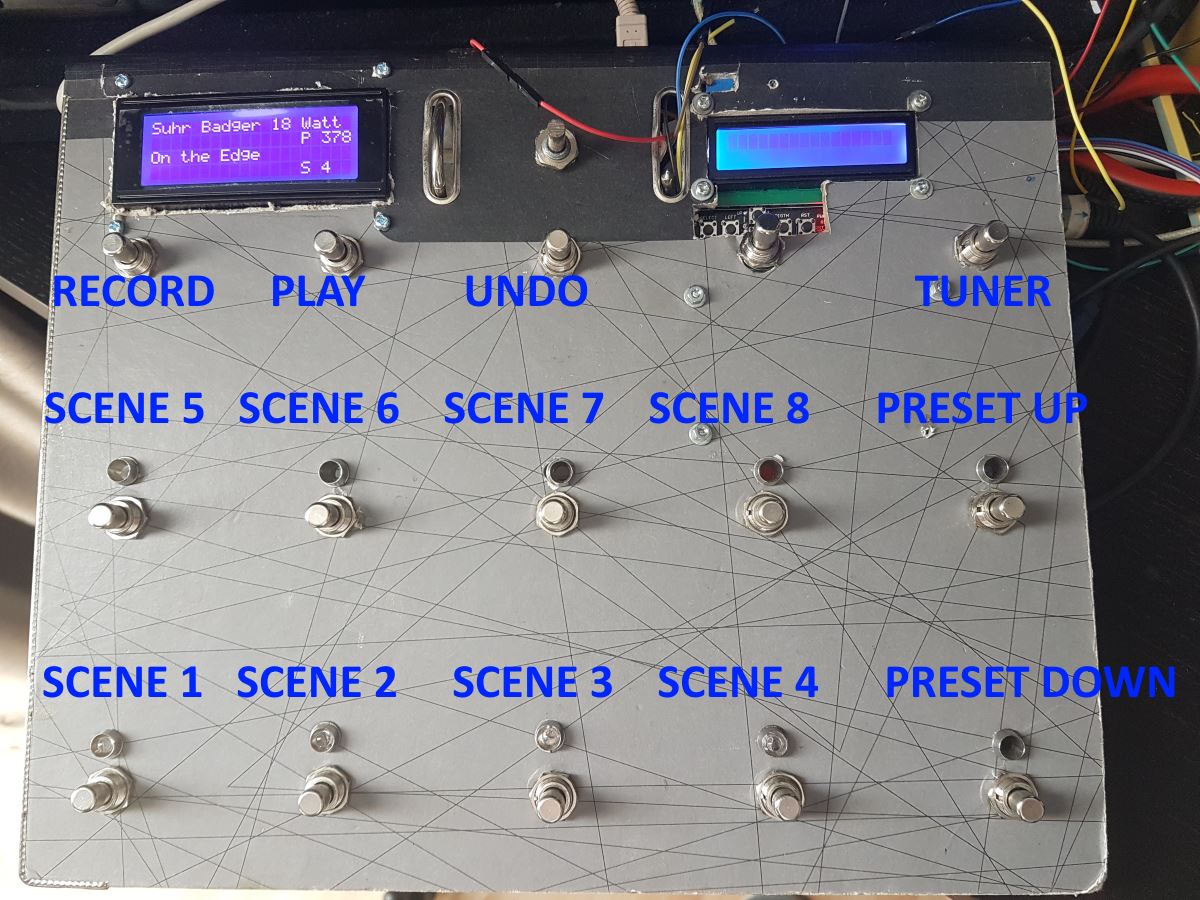
- 15 Pedal Switches (3 rows of 5)
- First row, switches 1-5: patch selection
- Second row, switches 1-4: Select Scene 1 to 4
- Second row, switch 5: Bank Down (subtracts 5 to the patch numbers selection)
- Third row, switches 1-4: Looper control
- Third row, switch 5: Bank Up (adds 5 to the patch numbers selection)
- LCD displays Bank and functions selected by switches
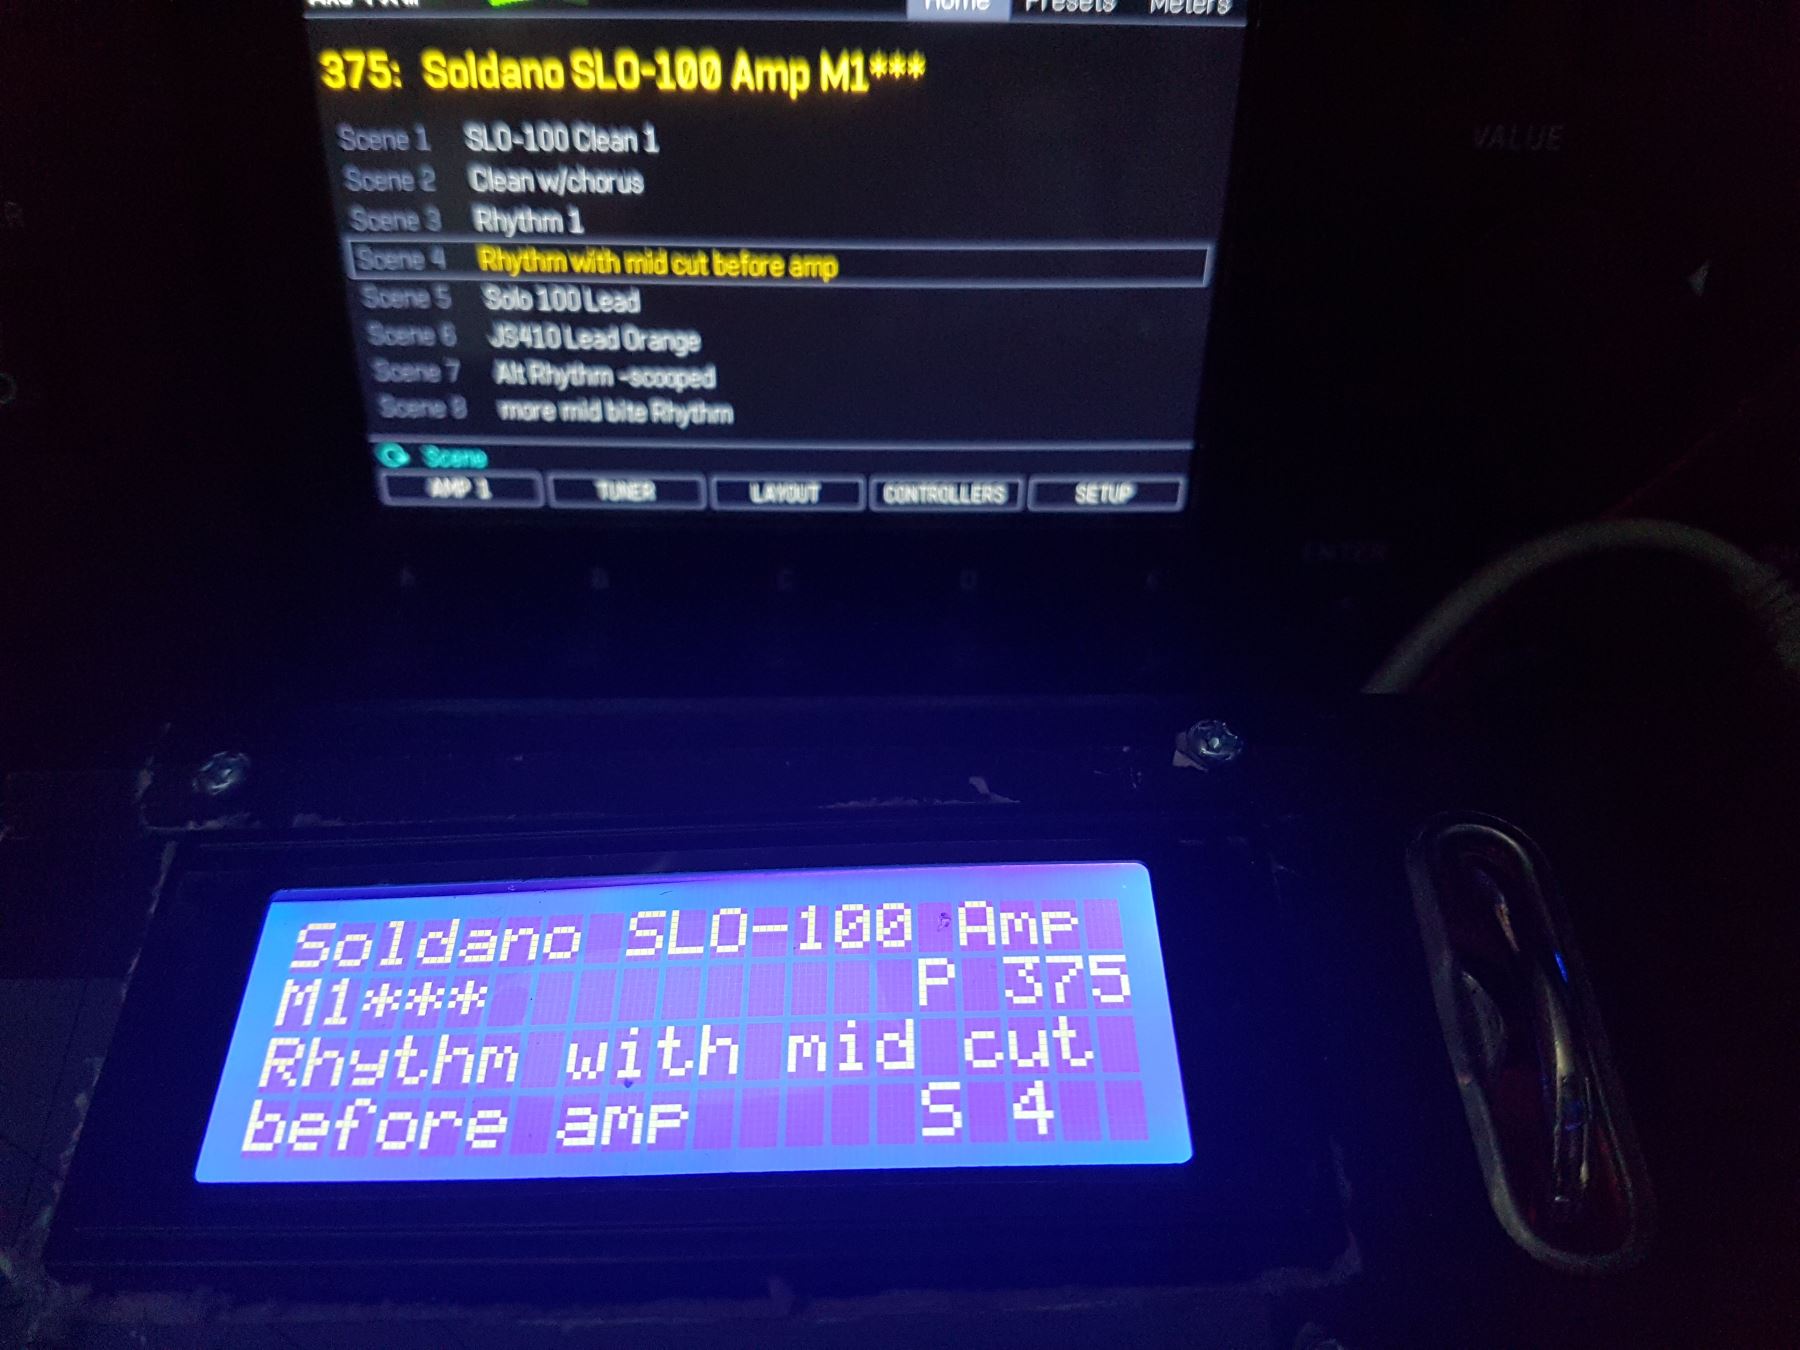
- Midi Input to read real-time data from Axe-FX. (23/Oct/2016)
Possibilities:
- Implement MIDI Input to read real-time data from Axe-FX. (preset name, scene, tuner, etc)
- Extra switches and inputs for external switches (the Arduino Mega has spare inputs/outputs)
- Inputs for external expression pedals (there are plenty of free Analog Inputs at the Mega)
- Programmable functions for the switches (you can already program anything that you want on the Arduino code, but this feature would permit changes on-the-fly)
- Full (or exceed) MFC-101 functionality
I have not implemented the MIDI input yet because I always have the Ax-FX close to me, so I can directly read its screen. I'll do it for fun when I have more time.
Connections:
Midi Output:
- MIDI DIN socket pin 5 connected to Arduino pin 1 (TX) through a 220 ohm resistor
- MIDI DIN socket pin 4 connected to Arduino +5 pin through a 220 ohm resistor
- MIDI DIN socket pin 2 connected to ground
Instructions: https://www.arduino.cc/en/Tutorial/Midi
Switches:
Common terminal of all switches connected to ground
The 15 Switches are connected to pins n. 22, 24, 26, 28, 30, 32, 34, 36, 38, 40, 42, 44, 46, 48, 50
http://www.instructables.com/id/Arduino-Button-with-no-resistor/
LEDs:
- Cathode (short leg) connected to ground
- Anode (long leg) connected through a 220 Ohm resistor to pins n. 23, 25, 27, 29, 31, 33, 35, 37, 39, 41, 43, 45, 47, 49, 51
Enclosure:
The enclosure for my prototype is free. I’ve just grabbed a recycled binder from the office. It is strong enough for home use. If you need a beer-proof enclosure you could use a large cookie metal box or whatever you can find...
Edit: 8-April-2018. New pictures
Last edited: