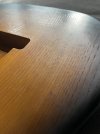
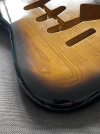
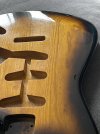
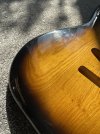
How to make a Fender style relic.

I will go in to doing a vintage tobacco bust a bit before I show pictures if this one (when it's done.)
The paint I use for this in not fully opaque so getting the solid part solid without runs ends up being the issue. You just can't help yourself putting on a bit much in one go the first time you do it. The better way IMO is to try to put two coats on only the edge before you attempt the burst part. If you want to see how this is done on video look at some of the fender custom shop things on Insta. Fender even paint a black edge with solid paint under the tobacco tint sometimes ( I don't like this but it makes it a lot easier.)
When you have a reasonable edge (nearly solid) you can start going around the burst . You should do it in a few passes getting better each time and evening it out where it needs it. Practice is the thing for this , if you wanted to try it I would suggest you paint at least one other thing in sunburst before a guitar body unless you like sanding. Also if you get a run or make a mistake you MUST let it dry completely BEFORE you try to fix it in any way. Nitro is your friend for this as it can be fixed and extra bits and touch ups melt together invisibly.
 
Last edited:
Another thing if you paint one of these at home you can and probably should do the front and the back separately . As I said above you can with nitro because even if you paint the back on another day the paint will blend together perfectly not true for poly or acrylic .
Another consideration if you stand the body on something to paint the top there will be blow back of the paint that misses the edge and it will leave an impression of what ever you stood the guitar on (think the paint can outline on the back of a 50/54 tele pickguard.) You can mask the face of the back when working on the font and as long as you leave it couple of days and use low tack on the front to do the back . I always try to get packing tape of any kind off the job as soon as possible to avoid problems. The burst will cover the line made by the tape if you do it right on the edge of the roundover.
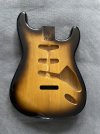
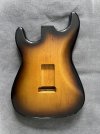
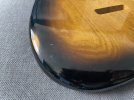
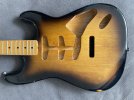
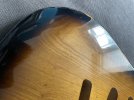
Anyway here is the front literally painted a half hour ago. Not done the back yet.
IMG_1991.jpg
 
Hardware on this is a good compromise . It is going to be relic Gotoh vintage all the way. As good as vintage hardware gets but not vintage accurate price. The bridge for example is about £85 as opposed to £250 for a clone. Neck plate £12 not £50 and so on. This is not trying to be a fake just authentic in vibe and tone. If this was a refinish vintage Fender I would be pulling out all the stops to copy the exact processes and spend a LOT more time doing relic work . I have done quite a few as you often get vintage Fenders that had a terrible refinish in the past. The solution is back to the wood and keep everything original looking as far as possible, also try a source vintage parts if anything is missing or altered.
 
Can you give a bit more detail on the checking of the headstock?
Did you heat it with a hair drying (like you mentioned earlier) and throw it in the freezer after?
 
Ha yes.
First you need to have tested your lacquer to be sure it doesn't contain plasticiser. This would ruin the look of the cracks if you could get them at all. Test on scrap first leave it for a week and then wet sand it smooth and polish it. Then you do need a hair dryer and a can of compressed air.
The propellant in the compressed air is below 0 degrees C as a liquid so if you invert the can you can spray the liquid directly on too the hair dryer heated work. You want hot but if you go too far it will blister this is why you need to do the test yourself with your own things that you are using to get a feel for the look you want and how to get it. The hotter you go the more and smaller cracks. You should go bit at a time but this will give random cracks. If you concentrate on the areas that crack small on vintage fenders and less on the rest it looks right. The even cracking that Gibson custom shop get is industrial fridge and paint drying heater so you won't get it to look that even . You can also get a small even crack putting the body in a chest freezer and then a warm room.
 
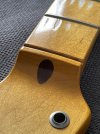
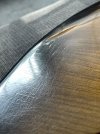
A bit of wet sanding with 2500 grit just to give the look of a smooth flat finish with a little grain sink.
IMG_1995.jpg
If you do more than this with the thickness of paint I have here you will go through for sure.
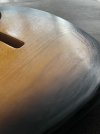
If you wanted it perfect flat and machine buffed you would just add a few extra clear coats here. Also used a thicker mix grain filler and thicker base coat but you can still get perfect flat with more clear now if you changed your mind. It would have been far easier to build a smooth perfect base coat though.
IMG_1996.jpg
It is only a very small deviation from flat here but it just combines with the other elements to look more convincing . The best part about this finish will be visible in the relic as in the damaged parts you will see just how thin this is. This is what separates it from most you see and also why is sounds better than a regular finish. You could just paint an NOS like this but it would defiantly have the odd flaw and take forever to do which is why you won't find it.
 
Now a bit of hand only polishing with cutting polish not rubbing compound.
IMG_1998.jpg
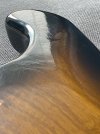
You can now see the part under the scratch plate that is typically not grain filled or even buffed in a 50's body in contrast to the more filled smoother "visible" part. I know this accurate is not needed on a replica but hey Leo did it like this to save time and who am I to argue:tearsofjoy:
 
Another shot to try and show this better;
IMG_1997.jpg
I just keep going until I like the look. It helps to have seen and photographed quite a few original 50s bodies from guitars I disassembled to write reports on . You get to see things in isolation and often you notice different things and you can incorporate them in a replica or restoration refinish.
You may have noticed that this body has not been painted on nails like an original. It has been done face at a time to see how this works out. This is only possible with nitro as new paint melts in to the old and I was experimenting with a method that anyone could do at home with rattle can nitro guitar lacquer .
 
I need to swap some pictures with the client today about the exact amount of relic work before I get started on the damage.
The next stage is minor dings and rub throughs followed by wear in the places that playing usually brings on these. It will be from a series of photos of originals but not trying to copy them because it is far harder to replicate particular instruments and keep it looking authentic.That said this whole thing is vastly easier that the relic 5150 project (in another thread.)
 
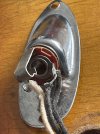
Here is a shot of a 50s original finish, I took this of the jack and soldering but it shows the checking and general condition of the paint that is typical of 50s Fenders .
IMG_1575.jpg
All that is needed on mine is a wipe of dark brown liquid shoe polish to slightly seep in to the checking to bring it out.
I think you would have to agree that this is pretty close.
On a forgery this would not pass the smell test or a black light but it is not a forgery.
I do know how to make it pass a blacklight but I'm not saying. The smell test is one of my most reliable on the best forgeries and I can say I have never let one through the net as original yet. BUT they get better and some parts I can get now are genuinely perfect replicas.
 
Ok light relic it is.
IMG_2041.jpg
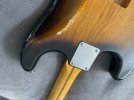
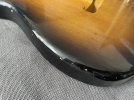
Rub throughs are very predictable and there exact position shows how long the strap was of the owner . The higher the rub the longer the strap. This should be reflected in the buckle rash position.
IMG_2044.jpg
These match.
 
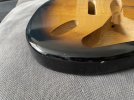
My favourite tool to add minor random dints and small chips (not entirely random) is a bunch of keys on a keychain that you can drop for heavy or swing for lighter . You can also swing it at a particular area and control the damage quite effectively .
Heavy chips can be done with a cabinet scraper as the paint is now brittle and chips easily like the originals did.
IMG_2040.jpg
and
IMG_2042.jpg
 
The chips will need some liquid shoe polish to kick back the newness and if that is not enough you can use cutting polish and then shoe polish and even graphite powder in the chips. Also you should polish the rub throughs that you did with fine wet and dry (used dry) back to a high gloss .They are rubs after all.
IMG_2039.jpg
IMG_2043.jpg
This is the wear that you would expect on a 9/10 vintage so hardly a heavy relic but IME it's the finish most people go for that I do.
 
Back
Top Bottom